What Can Your Driver Tell You?

One of the first things I do when I teach a golfer for the first time is I go through their clubs and take a look for certain tendencies as we're having our introductory chat. I have seen so many drivers that look like the one in this article that I had to write about it and share what your driver is attempting to tell you!

The first place to look for answers as to what might be going on is to check the face....

Driver Face

Driver Face

Notice here how the black paint is being worn off the bottom of the face and there are numerous impact marks on the upper portion of the face where sand is caught between the ball and the face.

Secondly, inspect where the crown of the club meets the face....
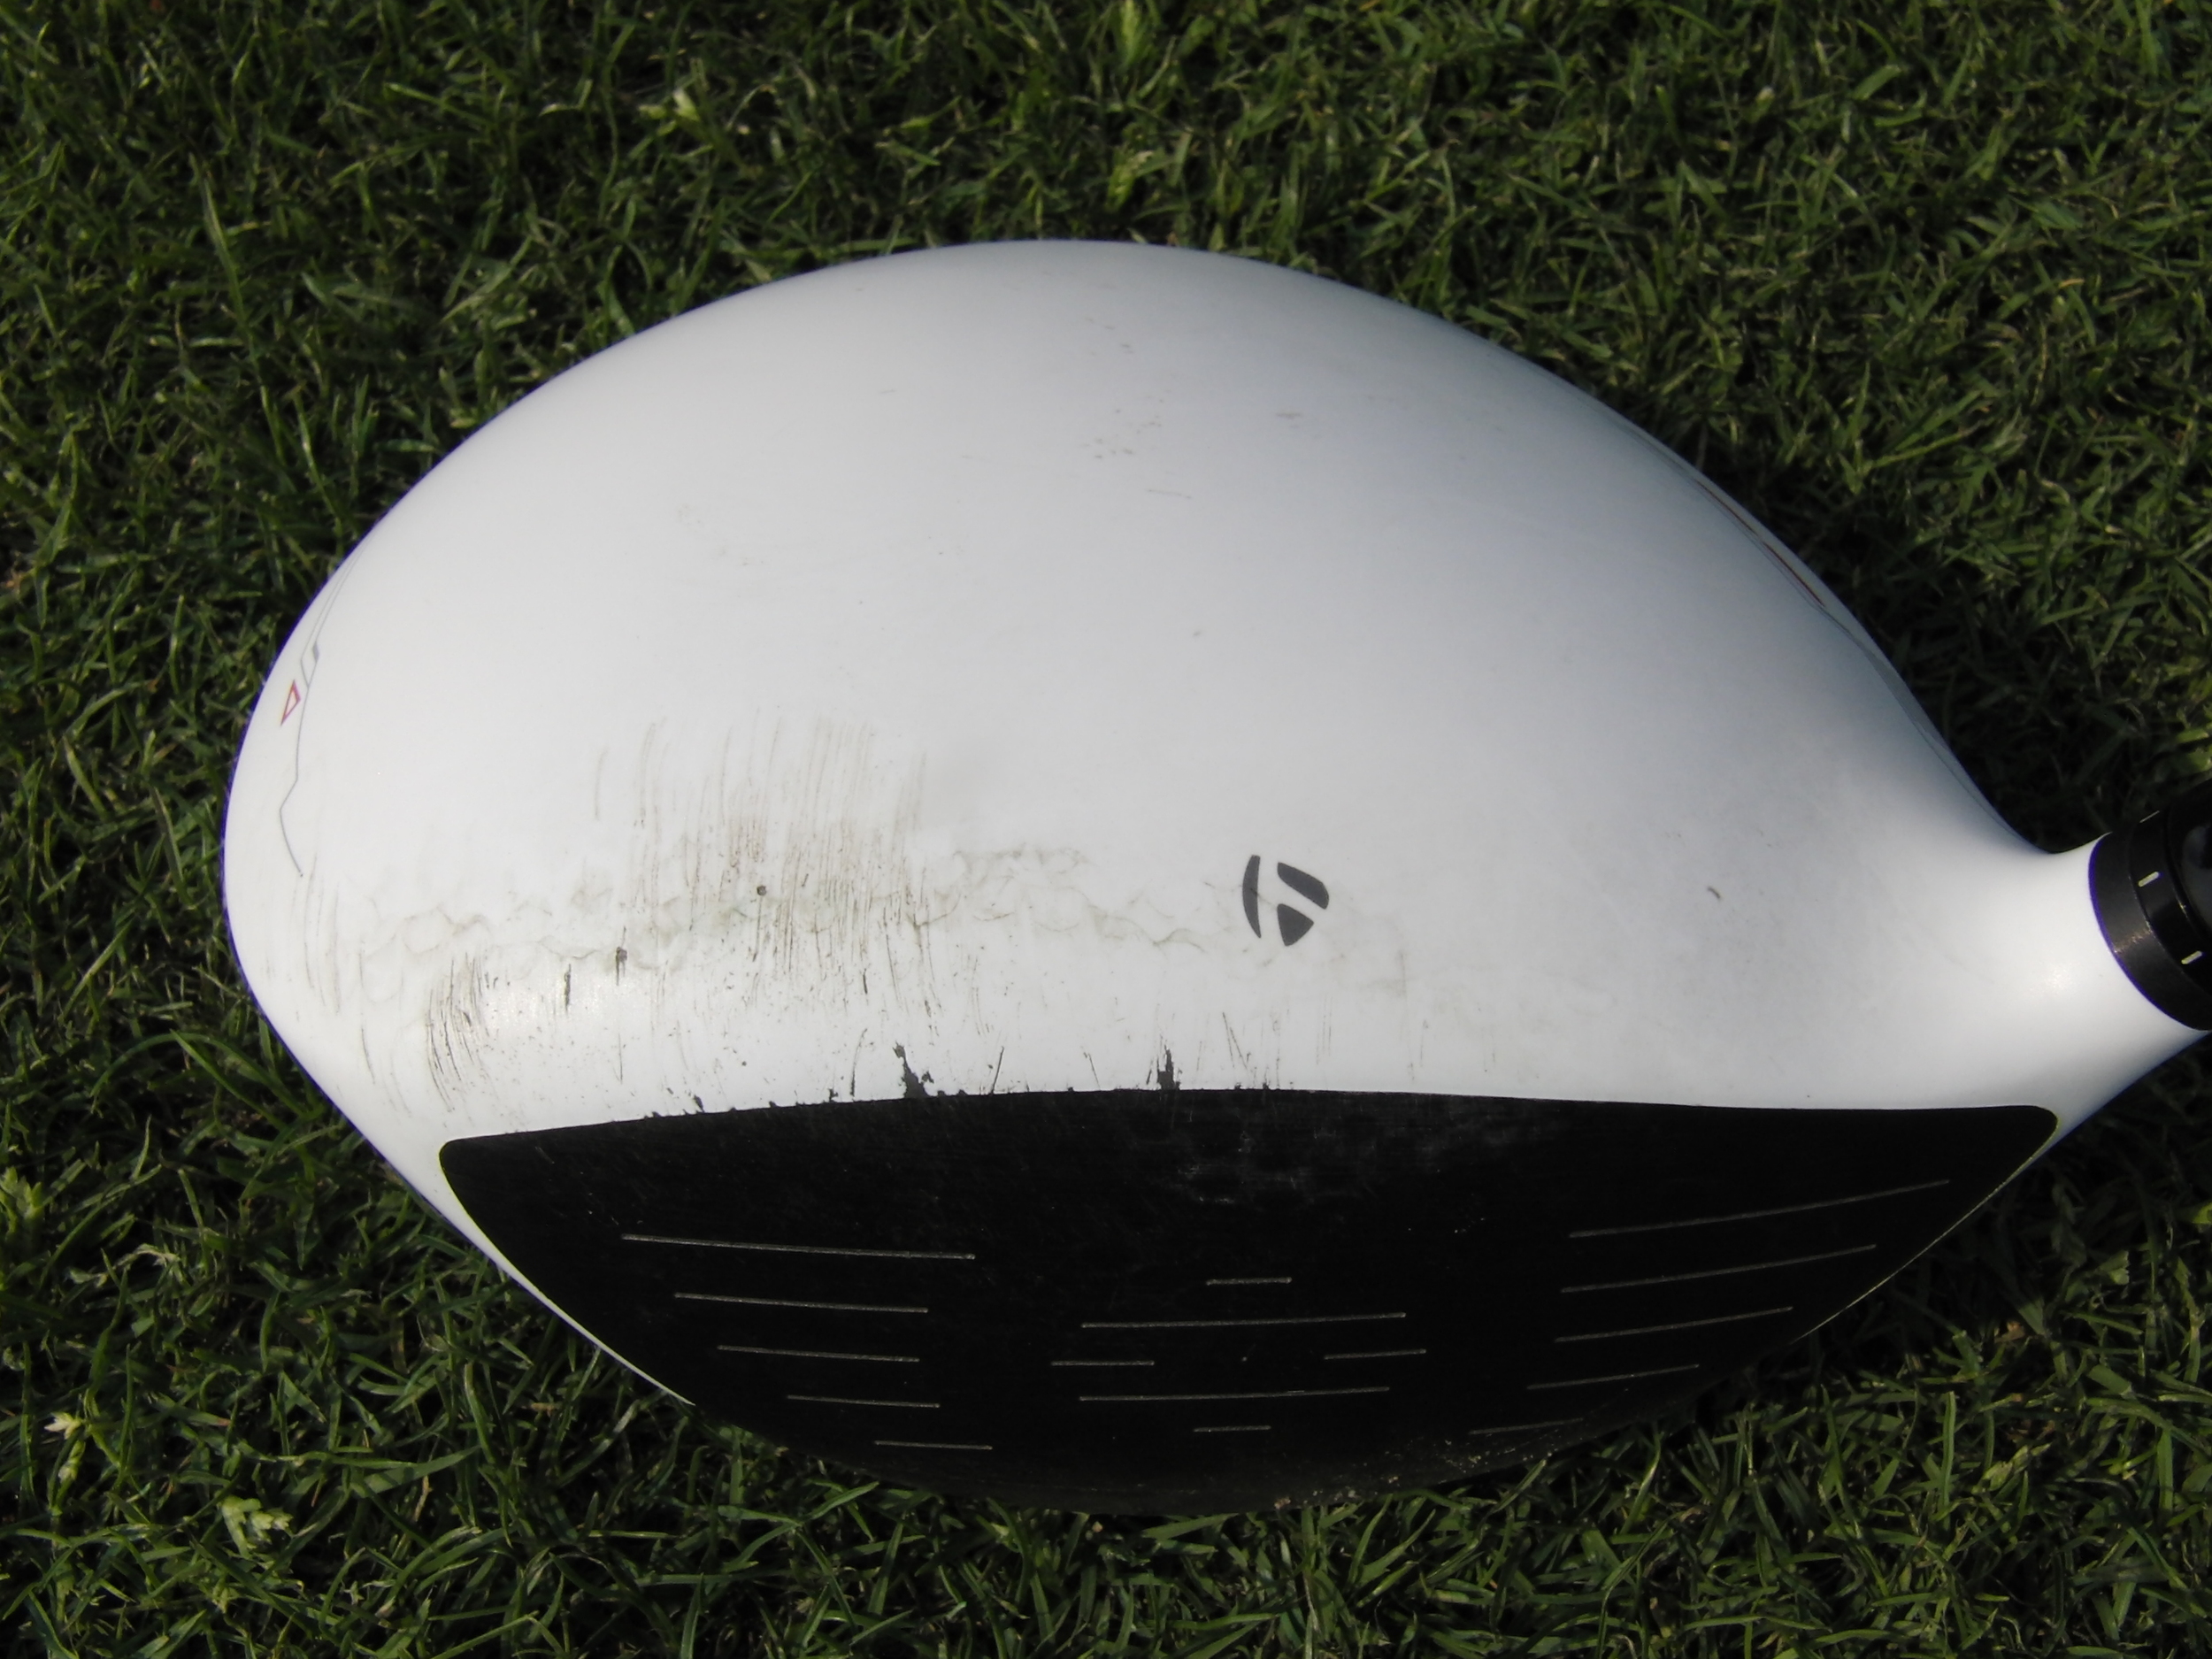
Driver Top Edge

Driver Top Edge

Here, the wear pattern indicates numerous pop-ups.  A few balls must have almost been missed to get them that far up on the crown.  Keep in mind that the only way to hit a pop-up is to have a descending blow where the top edge descends below the equator of the ball.

Finally, take a look at the sole of the club....
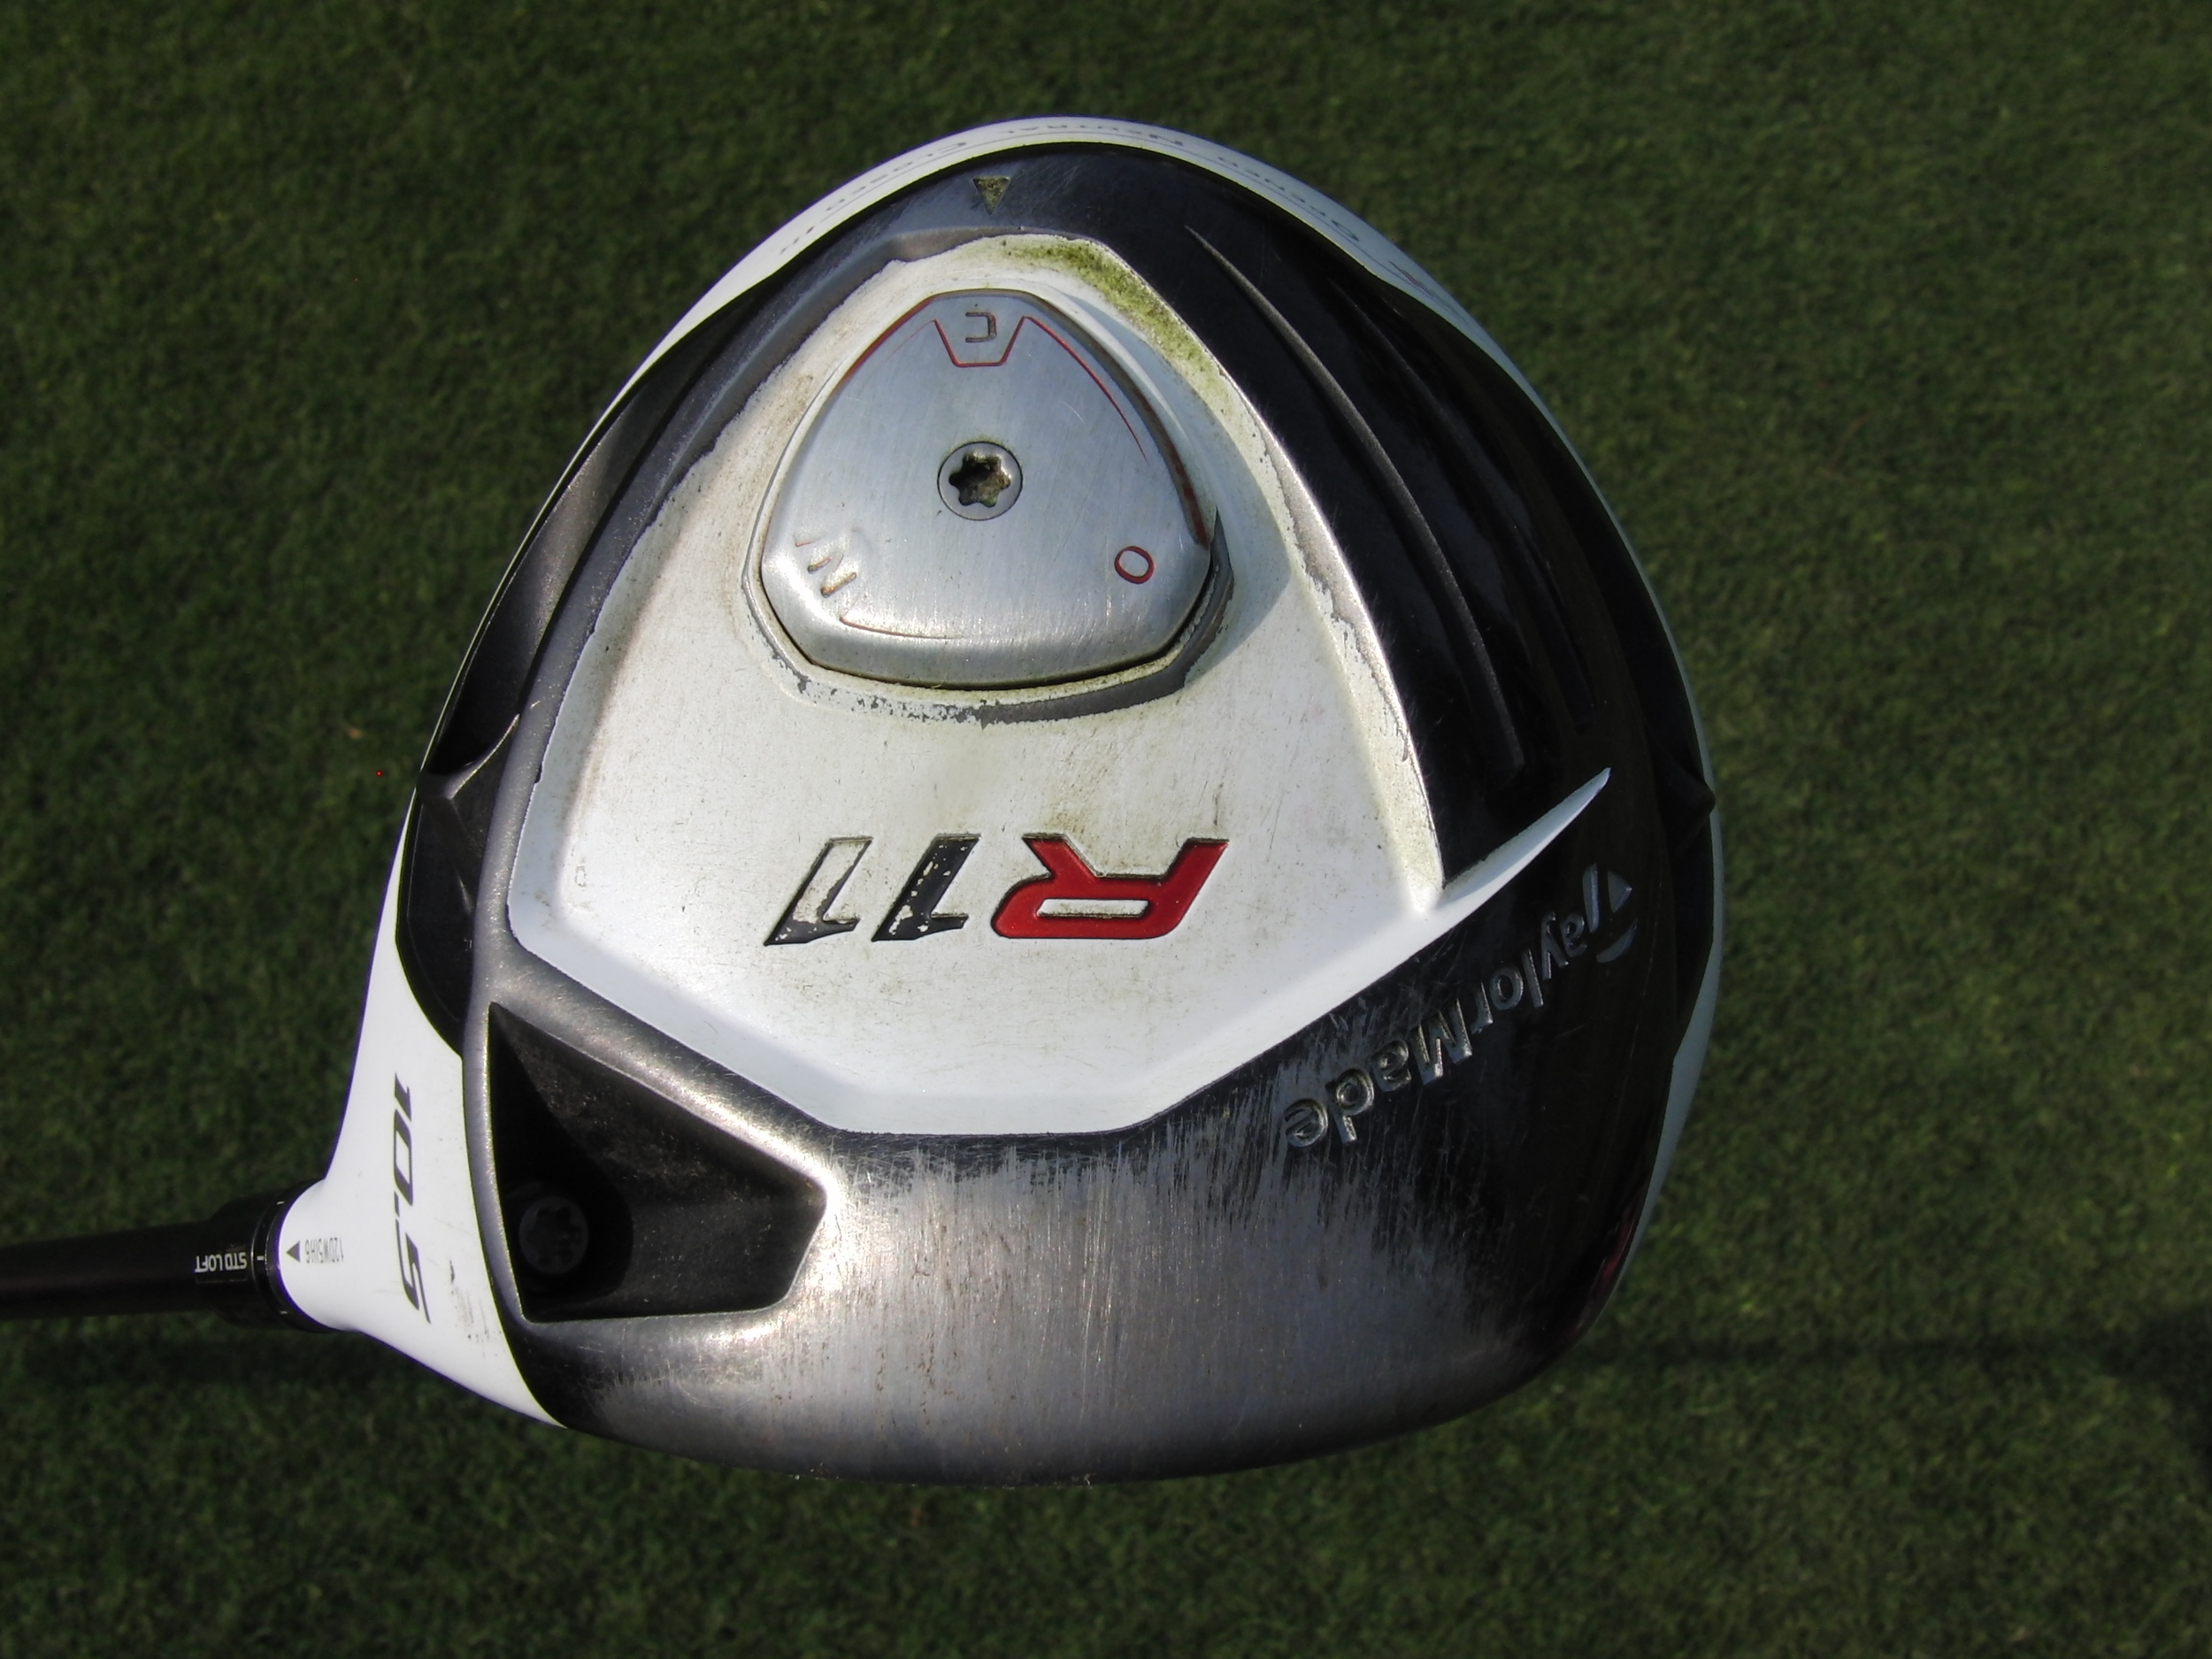
Sole of the Driver

Sole of the Driver

It is apparent here that the club is making contact with the ground on almost every shot.  The attack angle is very much down - to such a degree that both the paint and lettering are being buffed off the sole of this club.

The golfer who owns this club hit down on the ball with an attack angle of -11 degrees.  Keep in mind that optimally we would like to hit up on the ball for maximum efficiency.  I am pleased to report that he is working hard at his new attack angle and he is fairly comfortable in the -3 degree range - not perfect but better. Oh, and he just might extend this poor clubs lifespan at the same time.

Clearly I have selected an extreme example to show you here, but take a minute and inspect these three key areas on your driver.  I believe you will learn a fair deal about your angle of attack and why your golf ball is doing what it does.  Keep in mind that the only time a driver should ever contact the ground is when you are addressing the ball.  It should never contact the ground after the first foot or so of the swing. The only marks on it should be tee marks running along the sole and perhaps a ball mark or two in the center of the face!

Here are a few resources to help you hit more up on the ball:

Getting More Out of Your Driver

TrackMan Exposes Golf Myths

It has been an enlightening experience using TrackMan in almost every lesson for a year now.  There are so many widespread 'philosophies' (see: fallacies) that we, as golfers, have heard so many times we simply accept them to be truth. TrackMan says - hold on a minute!

Here are a few examples that come to mind:

  • You've got to "Release the Club through Impact"
The collision between club and ball lasts less than 1/2000th of a second and it simply is not possible to "release" or consciously alter the face angle during that very narrow time frame.  The face is what it is by the time impact happens.  For example - in 2012, by the time Bubba Watson teed it up in the Masters, his ball had not been on his clubface in competition for even one second! The only element that can alter the face during impact is an off center hit and that's far from conscious.
  • "Draws Must be Hit with a Closed Clubface"
Or vice versa, fades are hit with an open face.  Draws are really good if they start to the right (for righties) - agreed?  TrackMan shows that the clubface is primarily responsible for the launch direction of the ball and thus for a good draw the face should be to the right of the target with the clubpath (which primarily causes curve) being further to the right. When that, along with a centered hit occur, voila - we have a lovely push draw!  This also dispels the myth that the ball launches in the direction of the swing/clubpath.  Clubface (primarily) = launch.
  • "That Drive Had Tons of Sidespin..."
The vast majority of balls that are hit in the air have backspin.  If a golfball has backspin it cannot possibly also have sidespin.  Think about it - two types of spin on one ball at the same time?  So what makes it curve?  TrackMan shows that all shots that curve do so due to backspin on an axis (spin axis) that is tilted either left or right.  Curve is purely caused by backspin that is tilted to one side or another.
  • "My Divots Point Left so I Must Be Over the Top"
Because divots ideally occur after the collision between face and ball, the clubpath has a window of opportunity to start arcing back inside the target line.  I have seen anything from push fades, to hooks, to push draws from leftward pointing divots.  Divots do not tell us as much as we think, because they do not (and should not) occur at the moment of impact.
  • "That Ball Faded - I Must Have Cut Across It"
A very important factor in determining shot shape is not only the clubface relative to the clubpath, but also where the ball is struck on the face relative to the sweetspot.   For regular golfers off center hits occur on the majority of shots hit.  Balls hit off the toe of a club will always have a tendency to draw or fade/slice less and balls hit off the heel will always fade or draw/hook less.  Even one dimple on either side of the sweetspot will make a difference.  This means it is possible to swing for a draw and hit/strike for a fade.
  • "My Instructor Showed Me My Club Path on Video"
Ehhh....no!   Trust me on this one - what you see on video is a  2D version of a 3D event and the only way you can accurately know what your real clubpath is to be aware of your attack angle, which with video this is not possible either.  On video you will see the direction you are swinging in relative to the target, but there is no way to know your clubpath (which is what creates a good portion of ball flight).
  • "Hitting Down Always Leads to More Backspin"
Spin is created by many factors, but a steeply descending blow on its own will not alter spin.  When a golfer hits down aggressively they often also reduce the loft on the clubface, and a lesser lofted face will do nothing to increase backspin.
  • "Draws Are Much Longer and Spin Less Than Fades"
This is a good one!  With everything else kept the same a ball that spins on a left leaning axis has no reason to go further than a ball with a right leaning spin axis.  Now, keep in mind it's very difficult to keep everything the same (thus draws tend to be longer), but in a controlled environment both shots go the same distance.   Just be aware that a properly struck fade will most often go just as far as its draw side counterpart.

And while it's not a myth, even though PGA Tour golfers average out with a downward attack angle on the driver, TrackMan has more than done it's share to prove how maximum efficiency and distance can be achieved by hitting up with the driver.

Feel free to share your thoughts or questions.....

Hitting Up or Down? Here's How to Set Up

Correct Set Up for a Descending Hit
Shots struck off the ground need to be hit with a descending blow and shots struck off an elevated tee are better when hit with an upward blow - fact! While TrackMan stats for the PGA Tour may show that on average Tour players hit down on their driver (1.3 degrees), as mere mortal golfers, we need to make sure we are efficient and get the most distance we can out of the driver by hitting up on the ball.  If you need some more convincing how about this: Golfer A swings at 90mph and hits 5 degrees down on the ball (-5 attack angle). Their average well struck tee ball goes 234 yards. Now, golfer B swings at 90mph and hits 5 degrees up on the ball (+5 attack angle). Their average well struck tee shot travels 256 yards - a gain of 22 yards while swinging the same speed!  Ready to listen now....?
I have recently started noticing that many golfers actually set up to hit their irons in the same manner as their woods or vice versa. Ever wondered why so many of your playing partners are either good with the woods and not the irons or no good off the turf and solid with the driver?  The answer is, is that there are two different types of swings. One that suits shots hit off the ground or close proximity to it and a swing that suits the upward, efficient hit of a driver off a high tee.
The picture above is an excellent illustration of what I have been seeing.  Here, I have a student setting up to a driver and an iron. Notice any similarities? In case you're wondering the seven iron stance is on the right.  They look decidedly alike don't they? The good news is that this was taken at  the beginning of the lesson, she made the necessary changes and gained 14 yards with her driver while maintaining a solid descending impact with the irons.
It should stand to reason that if there are two swings then there should be two different set up positions.  Here are the important differences...
Setting up for shots off the ground:
  • As in the picture at the top of the page the weight should be anywhere from a 50/50 split to favoring the front foot slightly
  • Your head should be centered between the heels
  • There should be very little spine tilt away from the target and as a result the shoulders will be fairly level

Setting up for shots off a high tee:

  • As in the picture below the feet are fairly far apart and there should actually be a little more weight on the back foot than the front foot
  • The ball is positioned inside the left heel and teed high
  • The spine should be tilting away from the target a little as you prepare to "swing uphill" 

Set Up for an Upward Strike

The best teacher you have available to you to help with this is a mirror. You are now aware as to what it should look like, but you don't quite have the feel yet. Get in front of a mirror, set up so that it looks correct (your feel might have something else to say about it!) and take that with you to practice or play.

The Shoulder Pivot

One thing I have been seeing in my lessons recently has been a tendency for golfers to rotate their shoulders on a flat plane (like a merry-go-round!). This is, I believe, in an effort to extract as much turn as possible from the backswing. By doing this you create a situation where the arms are too wide (stretched), the upper body is 'pulled' off the ball by the turning of the shoulders (the lead shoulder runs into the side of the jaw) and due to the flat pivot action the right forearm is visible below the left when the left arm reaches parallel (for right-handers) - all elements that none of the top golfers employ in their swings. Here is an excellent drill that will provide you with the appropriate feel for a correct shoulder pivot:

The Set Up for the Shoulder Pivot DrillThis drill is designed to help convey the feel of getting your body into the correct position at the top of your swing. Assume your address as if you are preparing to hit a 7 iron. (It is best executed

with a ball in position.) Place an iron across the tops of your shoulders and cross your arms to support. Be sure to have the grip end off your lead shoulder and the clubhead flat against the opposite shoulder. During the pivot action of your swing, try to get the butt of the club to point at -- or slightly above -- the ball. Feel how the lead shoulder moves down as the shoulders wind into the backswing. This drill will also illustrate how the lower body needs to free up in order for the shoulders to pivot on a steeper plane. Sure, this drill is slightly overdone, yet it is rare for someone to get the shoulders to pivot on a plane that is too steep. As you do this drill try to feel how the shoulders are now tilting more like a ferris wheel than the flat, merry-go-round plane from before.

The "Top" of the Shoulder Pivot Drill There are so many benefits to having the shoulders pivot correctly. Here are a few nice side effects:

- If your swing tends to get too long, the steeper pivot actually creates more tension in the backswing and this will serve to tighten/shorten the backswing.

- Due to improved shoulder action, the upper body is now more inclined to stay centered, positioning you properly for a sound impact.

- If you have a difficult time taking the correct divot, a steeper shoulder turn will enable you to be in a position where you are now able to deliver a more descending blow to the back of the ball.

Try this simple standby drill - I beleive it will help you to make better contact more often. Ball first, divot second!

Read More

Thoughts on Sand Play

The greenside sand shot is unique to the game of golf in that it is the only shot we hit where we do not (or at least should not!) hit the golf ball.   Some people I know have hit their longest drives ever from a greenside bunker! Here are two simple things to keep in mind when extricating your ball from the sand:

  • Set-up and aim to hit the sand before the ball.  Hover the club over the spot that you intend to impact.   When practicing, draw a line in the sand and see how many times you can impact the sand right on the line.  Avoid holding the clubhead over the ball at address for more consistent ground contact!
  • In a regular golf shot we should be attempting to strike the ball first and the ground second.  This can only be done with a slightly descending blow and the weight on the golfers front foot.  Due to the fact that we only want all sand and no ball in the bunker there should be no forward weight shift into the hit.  Try to play sand shots with the back foot remaining fully planted and quiet throughout the swing.  The weight should remain where it was set at address. (Notice the post impact picture below) This will reduce those 'low heaters' out of greenside bunkers!

No weight shift!