The Truth about Divots

Demonstrating the Impact Drag Drill

Demonstrating the Impact Drag Drill

I think divots are over-rated. They are not integral to great ball striking and they certainly don't give us as much information pertaining to the swing that led to the divot as we have been led to think. And to think that I used to love them, I used to encourage all my students, even ladies, to hit down and take divots...

Times have changed! TrackMan has shown me that far more golfers hit down too much than those who don't hit down enough. The "hit down" mantra has been flogged to death.

This video I filmed in conjunction with Revolution Golf will give you some idea as to what to look for as you work towards an improved and shallower strike on the ball.

As Martin Chuck so aptly said in this very good follow up video, "We're looking for bacon strips, not pork chops!" A shallow strike will improve the crispness of your strike - give it a try.

Thanks for reading along.

What Can Your Driver Tell You?

One of the first things I do when I teach a golfer for the first time is I go through their clubs and take a look for certain tendencies as we're having our introductory chat. I have seen so many drivers that look like the one in this article that I had to write about it and share what your driver is attempting to tell you!

The first place to look for answers as to what might be going on is to check the face....

Driver Face

Driver Face

Notice here how the black paint is being worn off the bottom of the face and there are numerous impact marks on the upper portion of the face where sand is caught between the ball and the face.

Secondly, inspect where the crown of the club meets the face....

Driver Top Edge

Driver Top Edge

Here, the wear pattern indicates numerous pop-ups.  A few balls must have almost been missed to get them that far up on the crown.  Keep in mind that the only way to hit a pop-up is to have a descending blow where the top edge descends below the equator of the ball.

Finally, take a look at the sole of the club....

Sole of the Driver

Sole of the Driver

It is apparent here that the club is making contact with the ground on almost every shot.  The attack angle is very much down - to such a degree that both the paint and lettering are being buffed off the sole of this club.

The golfer who owns this club hit down on the ball with an attack angle of -11 degrees.  Keep in mind that optimally we would like to hit up on the ball for maximum efficiency.  I am pleased to report that he is working hard at his new attack angle and he is fairly comfortable in the -3 degree range - not perfect but better. Oh, and he just might extend this poor clubs lifespan at the same time.

Clearly I have selected an extreme example to show you here, but take a minute and inspect these three key areas on your driver.  I believe you will learn a fair deal about your angle of attack and why your golf ball is doing what it does.  Keep in mind that the only time a driver should ever contact the ground is when you are addressing the ball.  It should never contact the ground after the first foot or so of the swing. The only marks on it should be tee marks running along the sole and perhaps a ball mark or two in the center of the face!

Here are a few resources to help you hit more up on the ball:

Getting More Out of Your Driver

Understanding Heel and Toe Klankers...

As the size of the clubhead has increased over the last two decades so has the role that gear effect plays on off-center strikes. As the volume of the head increases so does the importance of a quality strike. I think the following video will go a long way towards explaining how this works and what it can mean for your game...

Now keep in mind that gear effect can be a help or a hindrance - it can cause your ball to curve to the target or away from it. Here's an example of how an understanding of the importance of strike point, particularly with the driver, can help any golfer avoid trying to fix something that isn't broken.

A Neutral Swing with a Heel Strike

A Neutral Swing with a Heel Strike

The Same Neutral Swing with a Toe Strike

The Same Neutral Swing with a Toe Strike

Notice how the delivery numbers (attack angle & clubpath) from the above two shots are eerily similar, yet the resultant ball flight could not be more different. The difference in the outcome of the examples above is purely due to the location of the strike for each shot. While the two shots are very different I see no need for this player to address their swing. They simply need to develop their skill at striking the ball in a consistent location on the face.

  • Toe sided strikes will lead to more draw or less fade.
  • Heel sided strikes will lead to more fade or less draw.
  • High strikes on the face elevate launch and decrease spin.
  • Low strikes on the face lower launch and increase spin.
  • Gear effect works in 3D - the head will twist away from the strike location.
  • If the CoG is closer to the strike point, then there will be less curvature from gear effect on off-center hits. 
  • If the CoG is further from the strike point, then there will be more curvature from gear effect on off-center hits. 
  • Controlling the strike location is a skill - practice accordingly.

If you're looking to gain a better understanding of how you're striking the ball with your  "headcover" clubs, buy yourself a few cans of Dr. Scholl's Odor X. Spray the face of your driver the next time you're warming up or practicing to get some all important feedback.

Your next question might be - "How do I upgrade where I'm striking the ball?" Valid. I am of the opinion that controlling the strike point is a skill. A fun drill is to practicing striking the ball in a variety of unusual, yet intentional, locations on the clubface. Here are additional resources to help you understand and manage the strike point:

Collision! — Andrew Rice Golf

Strike Point Drill — Andrew Rice Golf

Optimal Strike Point for Longer Drives — Andrew Rice Golf

Spin Rate and the Driver — Andrew Rice Golf

Swing Pattern vs Strike Point — Andrew Rice Golf

A Proper Putting Set Up

I see far too many "regular" golfers setting up with their hands too low and the toe of the putter way up in the air. The picture below shows the difference between what it should look like and what I see all too frequently...

puttingsetup.jpg

If the toe of the putter is overly elevated, as we see above, then the effective loft on the face (and a putter always has some loft) will point left for right handers.

Here's a video I made after a recent lesson that shows what to look for, the changes and how to make the necessary adjustments to set up like the pros.

Spend some time with your putter in front of the mirror and you'll soon start to grasp the sense required in order to improve how you set up correctly to your putter.

Thanks for reading and please post your comments below.


Driver Education

Here's a fun video I filmed in collaboration with Mark Crossfield and Denis Pugh. I believe it covers almost all the pertinent points any golfer should be looking into in order to be able to hit the ball longer and straighter...

I hope you enjoyed this and are keen to get out there and try a few of the suggested ideas and drills to see if you can improve off the tee.

Thanks for watching!

The Importance of Wrist Angles

wristangles.jpg

I believe that for years I have misunderstood the importance of wrist angles throughout the golf swing. The most important part of any golf swing is the players ability to manage the face angle relative to the club path and wrists are integral in positioning the clubface properly throughout the swing.

I have come to realize that wrist angles are more important than grip position/angles. I see far too many golfers with very strong grips who slice the golf ball! If you'd like to hit draws (and you should) then you need the clubface closed relative to the path and a bowed lead wrist throughout the swing will do wonders in enabling you to hit those lovely, baby draws.

If you study the above photograph you'll see four very different, and very functional, looks regarding wrist angle at the top of the backswing. Due to the fact that most golfers slice the ball I would encourage all slicers and faders to work towards emulating Dustin Johnson (far right) in their practice. I'm not saying that with a bowed left wrist you are guaranteed to hit draws, but it does allow for functional options regarding shot shape.

Here is a helpful video I filmed on  recent trip with my friend in Ireland, Stephen Ennis from Balcarrick GC.....

Talking to Andrew Rice on why a strong lead hand can cause a bowed lead wrist and possibly lead to a fade/cut/slice. Andrew gives us a good drill to start hitting a little draw.

I love this from my friend Joe Mayo (@TrackManMaestro):

"When one embraces the idea that a functional face to path relationship is the bottom line of the golf swing, it allows them to let go of positional golf instruction and the veil of confusion of how great swings of the past and present actually work is lifted."

The golf swing really does not have to have a certain appearance in order to function - it simply needs a predictable face to path relationship. And the wrist angles are vital in managing this relationship.

leetrevino.jpg

Thanks for reading! If you're looking to experience a little sunshine in the cold northern hemisphere winters check THIS out.


Swing Pattern vs Strike Point

You may have heard me talk about how common it is to see golfers hit a tee shot with a fade (out-to-in club path) swing pattern, yet strike it off the toe for a baby draw or vice versa. The other day I was giving a lesson and a student hit a shot that was too interesting to not share. Here are the TrackMan details of the driver shot:

trackman heel hit

First a few basics:

  • Club path is primarily responsible for the curve of any shot
  • The direction of the club path relative to the target, out-to-in (fade pattern) or in-to-out (draw pattern), is what I refer to as a players swing pattern
  • Players that swing from in-to-out will tend to hit draws and players that swing from out-to-in will tend to hit fades
  • Where the ball is struck on the face of the driver (strike point) can drastically alter the effect of a players swing pattern on ball flight
  • Shots struck off the heel will tend to fade more or draw less and shots struck off the toe will tend to draw more or fade less

The player who hit the above shot has a fairly strong draw bias to his swing pattern and we are always working to neutralize his strong in-to-out club path as he tends to struggle with blocks and hooks. As you can tell from the above shot the club path (first highlighted yellow box) was strongly from in-to-out - 9.2 degrees to the right of the target. Well then why did the ball fly straight (spin axis 0.2)

The particular shot we're looking at was struck well off the heel (yellow circle) and essentially what happened was the draw bias of the swing pattern was cancelled out by the fade bias of the strike point. Notice how in the second yellow box above there's a closed face to path relationship, which should lead to a hook, but the ball flew straight - always a dead give away for a heel strike.

I've come up with a simple formula to help explain this:

A + B = C 

Where A is the swing pattern, B is the strike point and C is the resultant ball flight. You see it's the combination of A and B that gives us the ball flight - not just A. Here's a video I did with TrackMan that might help to explain some of this more clearly:

TMU Master Andrew Rice takes us through what he calls "swing pattern versus strike pattern". Most avid golfers have a consistent swing pattern (club path) but it's usually their strike pattern (impact point) that causes differences in ball flight.

When you're practicing driver you should always mark the face with some Dr. Scholl's Odor X foot spray. If you do that you will always get B (strike point) and C (ball flight) from any shot. Should you be practicing without a TrackMan you'll at least have a clear idea as to what your swing pattern is and can make well-informed adjustments if necessary.

All the best and thanks for reading.


Every Shot Counts by Mark Broadie

With Every Shot Counts Mark Broadie has written the most important golf book I have ever read. I say that because the book has done more to shape how I coach and deliver a golfer to their full potential than any technical manuscript before it.

Mark Broadie has done an exceptional job in sifting through the mountain of Shotlink data generated by the PGA Tour over the last decade. A Columbia Business School professor and avid golfer, Broadie is widely credited with coming up with strokes gained - a measurement of how much better or worse a golfer performs off the tee or from any given distance when compared with all other PGA Tour players.

The PGA Tour has been using strokes gained putting for a while now, but Broadie has also developed strokes gained driving for tee shots; strokes gained approach for shots of more than 100 yards; and strokes gained short game for shots of less than 100 yards, excluding putts. Add them together and you get total strokes gained.

From 2004-12 the top 10 players in total strokes gained were: Tiger Woods, Jim Furyk, Phil Mickelson, Luke Donald, Vijay Singh, Ernie Els, Sergio Garcia, Adam Scott, Steve Stricker and Zach Johnson. A pretty impressive list and arguably the best players in the game over the last decade.

The author goes on to show how these proven golfers outperformed their counterparts - "Two-thirds of the strokes they gained were from shots outside of 100 yards and one-third was from inside 100 yards," Broadie said. "Putting accounted for just 15 percent of the scoring difference between the top 10 golfers in the world and the average PGA Tour pro."

Wow! I have quizzed many of my students over the past few weeks on how they would rank, in order of importance, the four primary areas that contribute to the standard of any golfer. I think one person (who had secretly read about the book and it's findings) got the order correct. Most of them had it completely backwards. It also shocked me how many ranked putting as the most important factor.

Here is the order: (followed by the player who gained the most strokes on their competitors over the last decade)

  1. Approach shots outside 100 yards (Tiger Woods)
  2. Driving (Bubba Watson)
  3. Short game shots inside 100 yards (Steve Stricker)
  4. Putting (Luke Donald)

To me this order is hugely important as it should influence the manner in which you go about improving. I have encouraged all my students to ramp up the amount of long iron, hybrid and driver practice they have been doing.

Essentially, good golfers are good because they hit it good.

markbroadie

The book also shows the importance of length and what an asset making the ball go a long way is. Bubba Watson has literally pummeled his competitors off the tee with brute power and speed. Now all of my competitive students work on speed sets to increase their clubhead speed as much as possible.

The book is filled with valuable nuggets for both the better and weekend golfer - far too many to mention in an article like this. It includes drills for putting and even ideas on how to approach challenging tee shots dependent on your ability. If you are an avid golfer or coach and you find that your progress has plateaued, do yourself a favor and go out and buy this book and commit to reading it twice. The second time with a highlighter in hand!

If you don't get anything from it call me and I'll refund you your money...

Controlling Wedge Shots

Here is a video I did with the help of TrackMan and a student of mine James Willis. This was actually the first time I had seen James pitch the ball and it was nice to see how quickly he hit better shots and improved the flight and spin rate of these important shots.

From 60 yards and in I like to see a dynamic loft of 40 degrees, a launch angle of less than 30 degrees, a spin rate higher than 6500 rpm and a slight draw shape.

Take a look to see how it's done...

For a deeper understanding of this shot and all wedge shots around the green you need to go HERE

Winter Weather Drills

With the entire northern hemisphere seemingly in the grip of the polar ice cap I have come up with two drills that can be performed without a club and indoors.  They should prove to be invaluable to golfers of every caliber. The Ball Compression Drill

The Ball Compression Drill

This is a drill to do at home or in the gym and translates the feeling of impact nicely. Be sure to only drive the hips to compress the physio ball and not the entire body.  Do this drill on a regular basis and you will really start to gain a sense for what the downswing should feel like.

Arms at Impact Drill

This drill conveys the feel for what the hands and arms need to be doing as they approach impact. It can easily be done indoors and is something that every golfer could benefit from.  Be sure to start this drill with some crease in the right elbow and right wrist if you are a right hander.

If you are hunkered down indoors yet still feel the need to work on your game these drills will go a long way towards preparing you for when the season rolls around. Please view all the above drills and others on my Youtube channel. Just enter andrewricegolf to see them all.

Controlling the Clubface

Here's a great drill that will help to create awareness of where the clubface is angled at impact...

Keep in mind that the clubface is PRIMARILY responsible for where the ball launches, while the clubpath is PRIMARILY responsible for the curvature of the shot. If you know the predominant shape of your shots, the key is to launch the ball in the proper direction - this drill will help! Give it a try and please let me know if you've made any progress.

Strike Point Drill

Strike Point Drill I have had so many people ask me how to better control where they strike the ball on the face that I had to share this drill. Most golfers display a consistent pattern when striking the golf ball and although the impacts points may not be in the exact same position, after hitting a handful of shots a definite pattern will start to emerge. Many golfers want to hit draws and a slight toe side bias to that strike pattern will encourage draws. The ideal strike point with the driver is above and outside of center. Here's how to build your strike point awareness and ultimately improve your ability to hit it on the good part of the face.

I spray the clubface with Dr. Scholl's Odor X foot spray and then divide the clubface into four quadrants. The objective is to place the center of the ball in each intended quadrant.

  • The frist shot should be the high toe strike
  • Followed by the low heel
  • Then the more difficult shots, the low toe
  • And the high heel.

The above photo is the first time I have ever seen anyone complete this drill on the first try. The more I learn about the importance of impact location, the better I feel about this quote from my Twitter feed:

I see a higher correlation between quality shots and where the ball is hit on the face, than just about any other factor in the swing.

You may ask why don't we just practice hitting the shot on the intended location? As my friend and fellow coach Chris Como once shared:

Repeatability does not necessarily come from just trying to be more repeatable. Learn to solve similar 'problems' a variety of ways...

In other words - learning to hit the ball in a variety of locations on the face will actually make you better at hitting it in the desired location.  If you can learn to better (you'll never be perfect!) control where you impact the ball on the clubface you will dramatically improve the consistency and quality of your shots. Give it a try and feel free to share your experience and photos.

Any idea which shot went the longest out of the four? Read the link below for the answer...

Optimal Strike Point for Longer Drives | Andrew Rice Golf


Hitting Draws and Smash Factor

Bobby Locke There has been a fair amount of banter online recently regarding various topics and I thought it would help both of us if I jotted down a few thoughts:
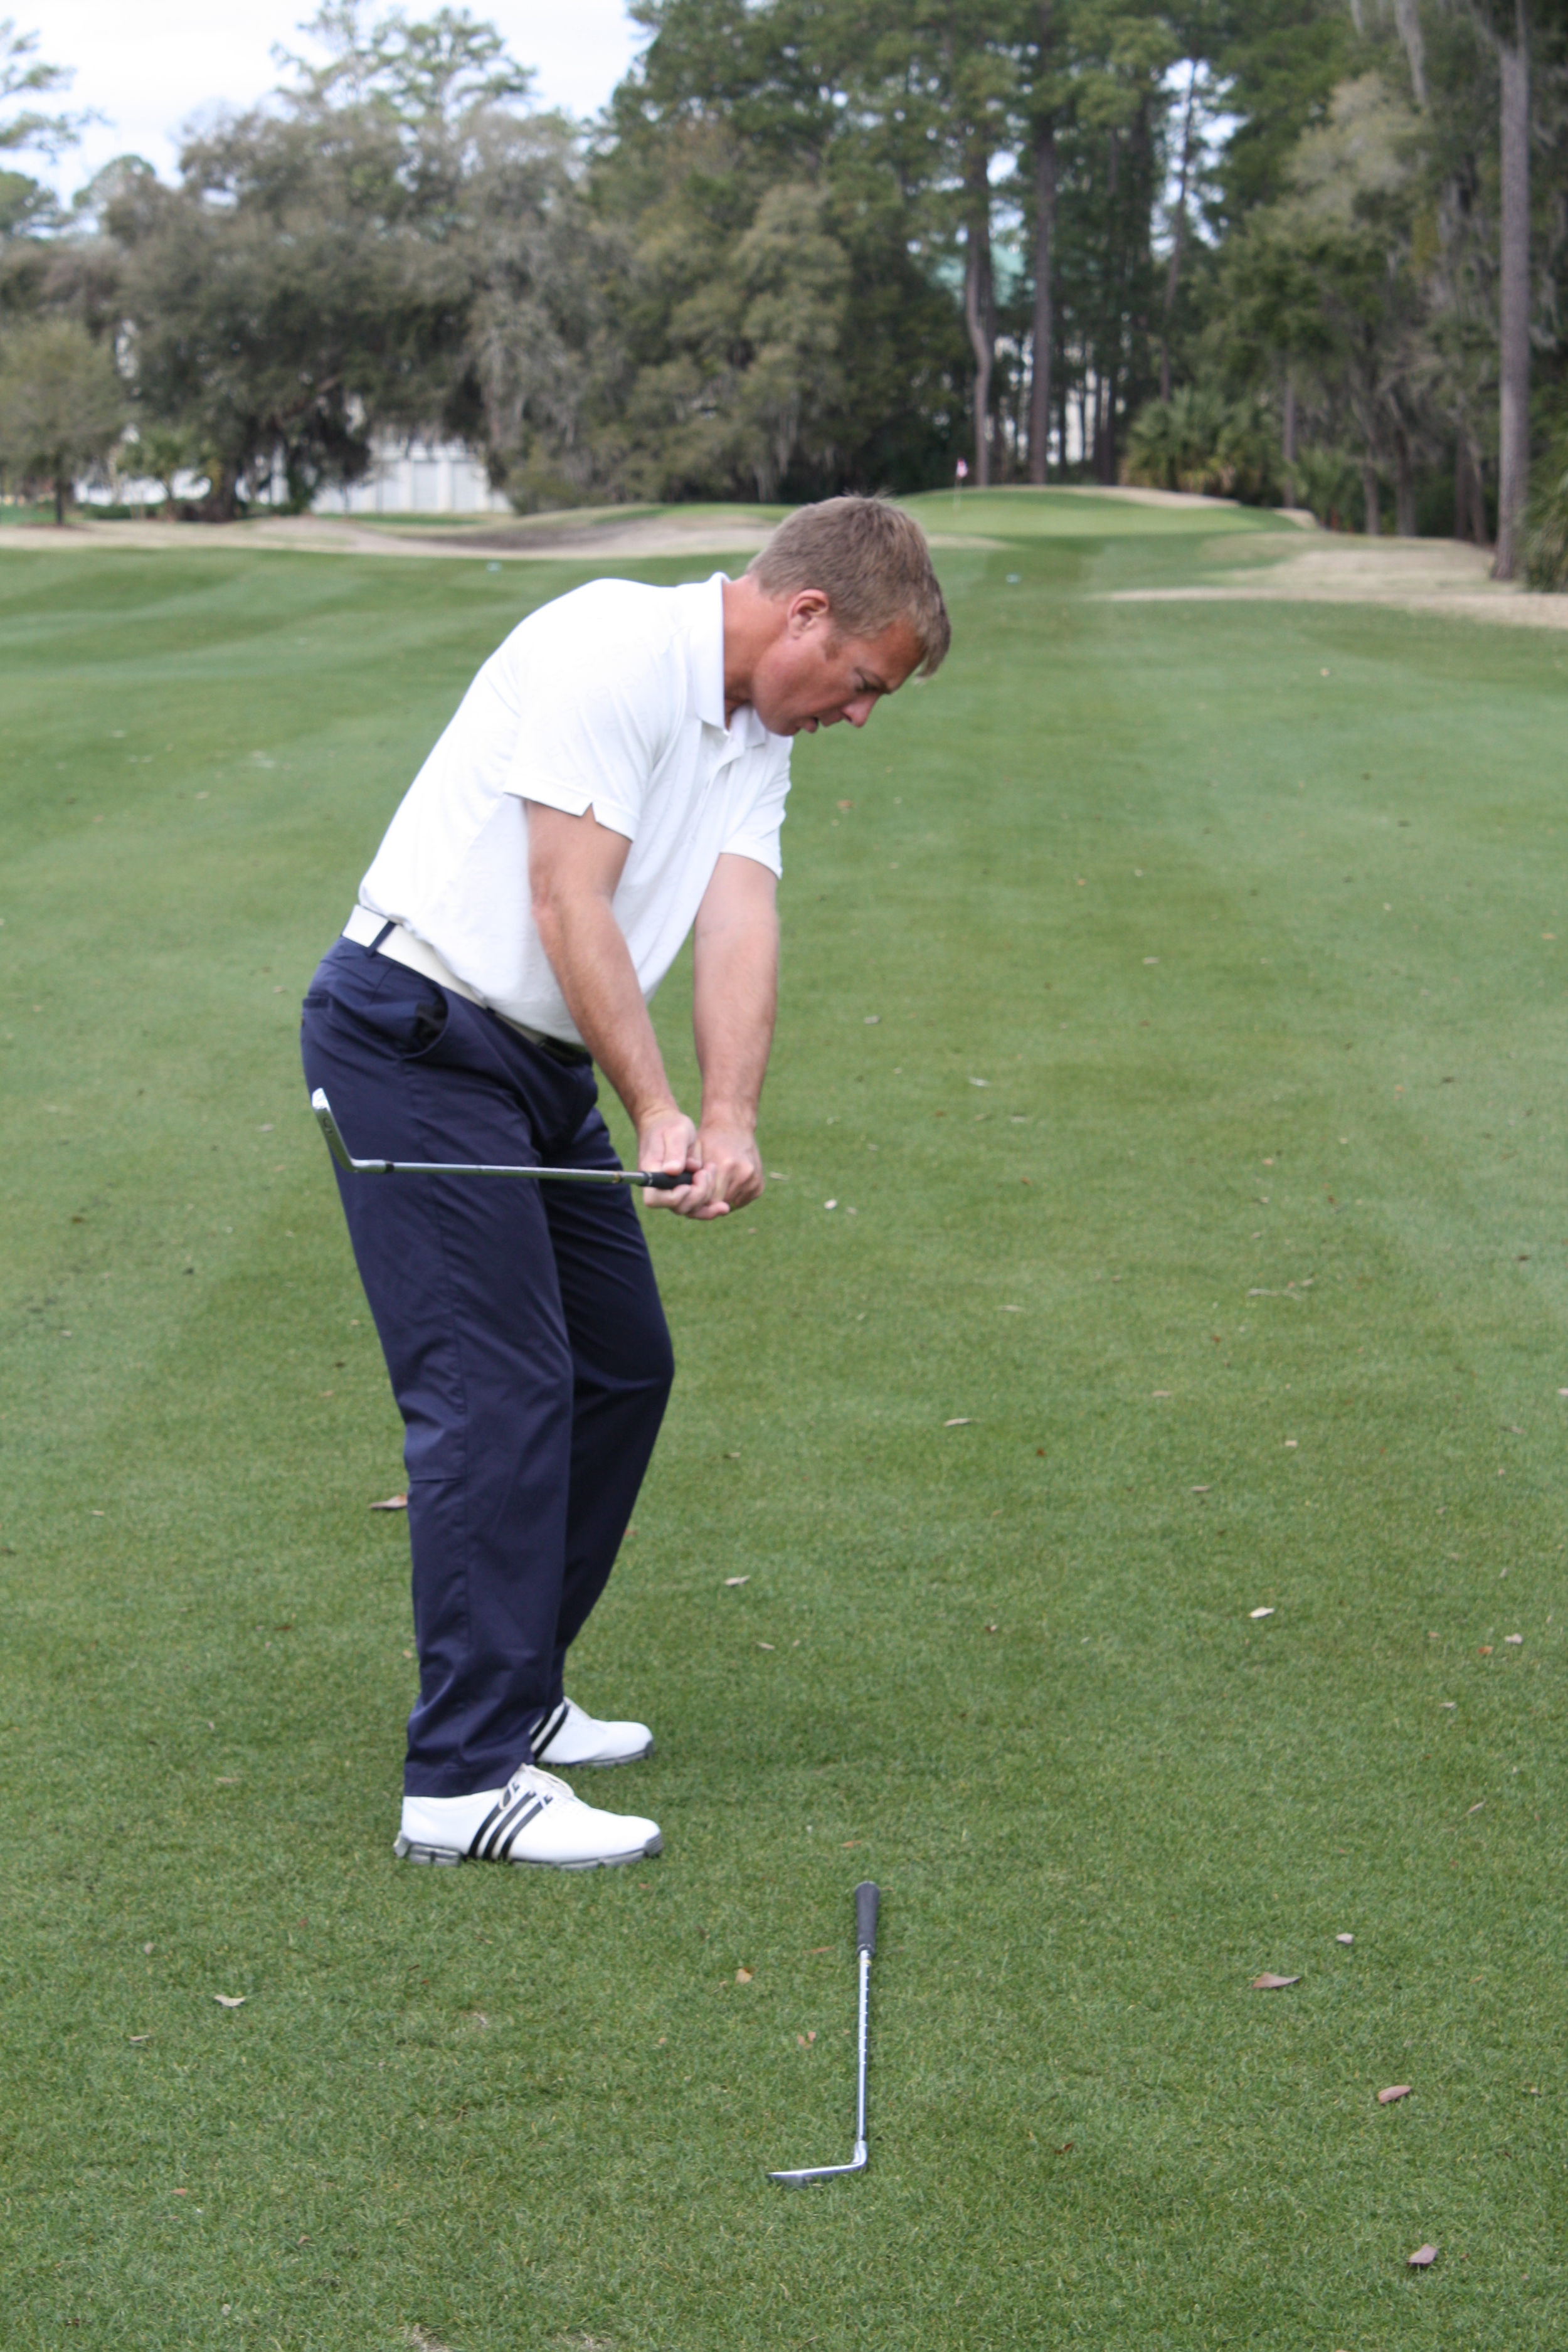
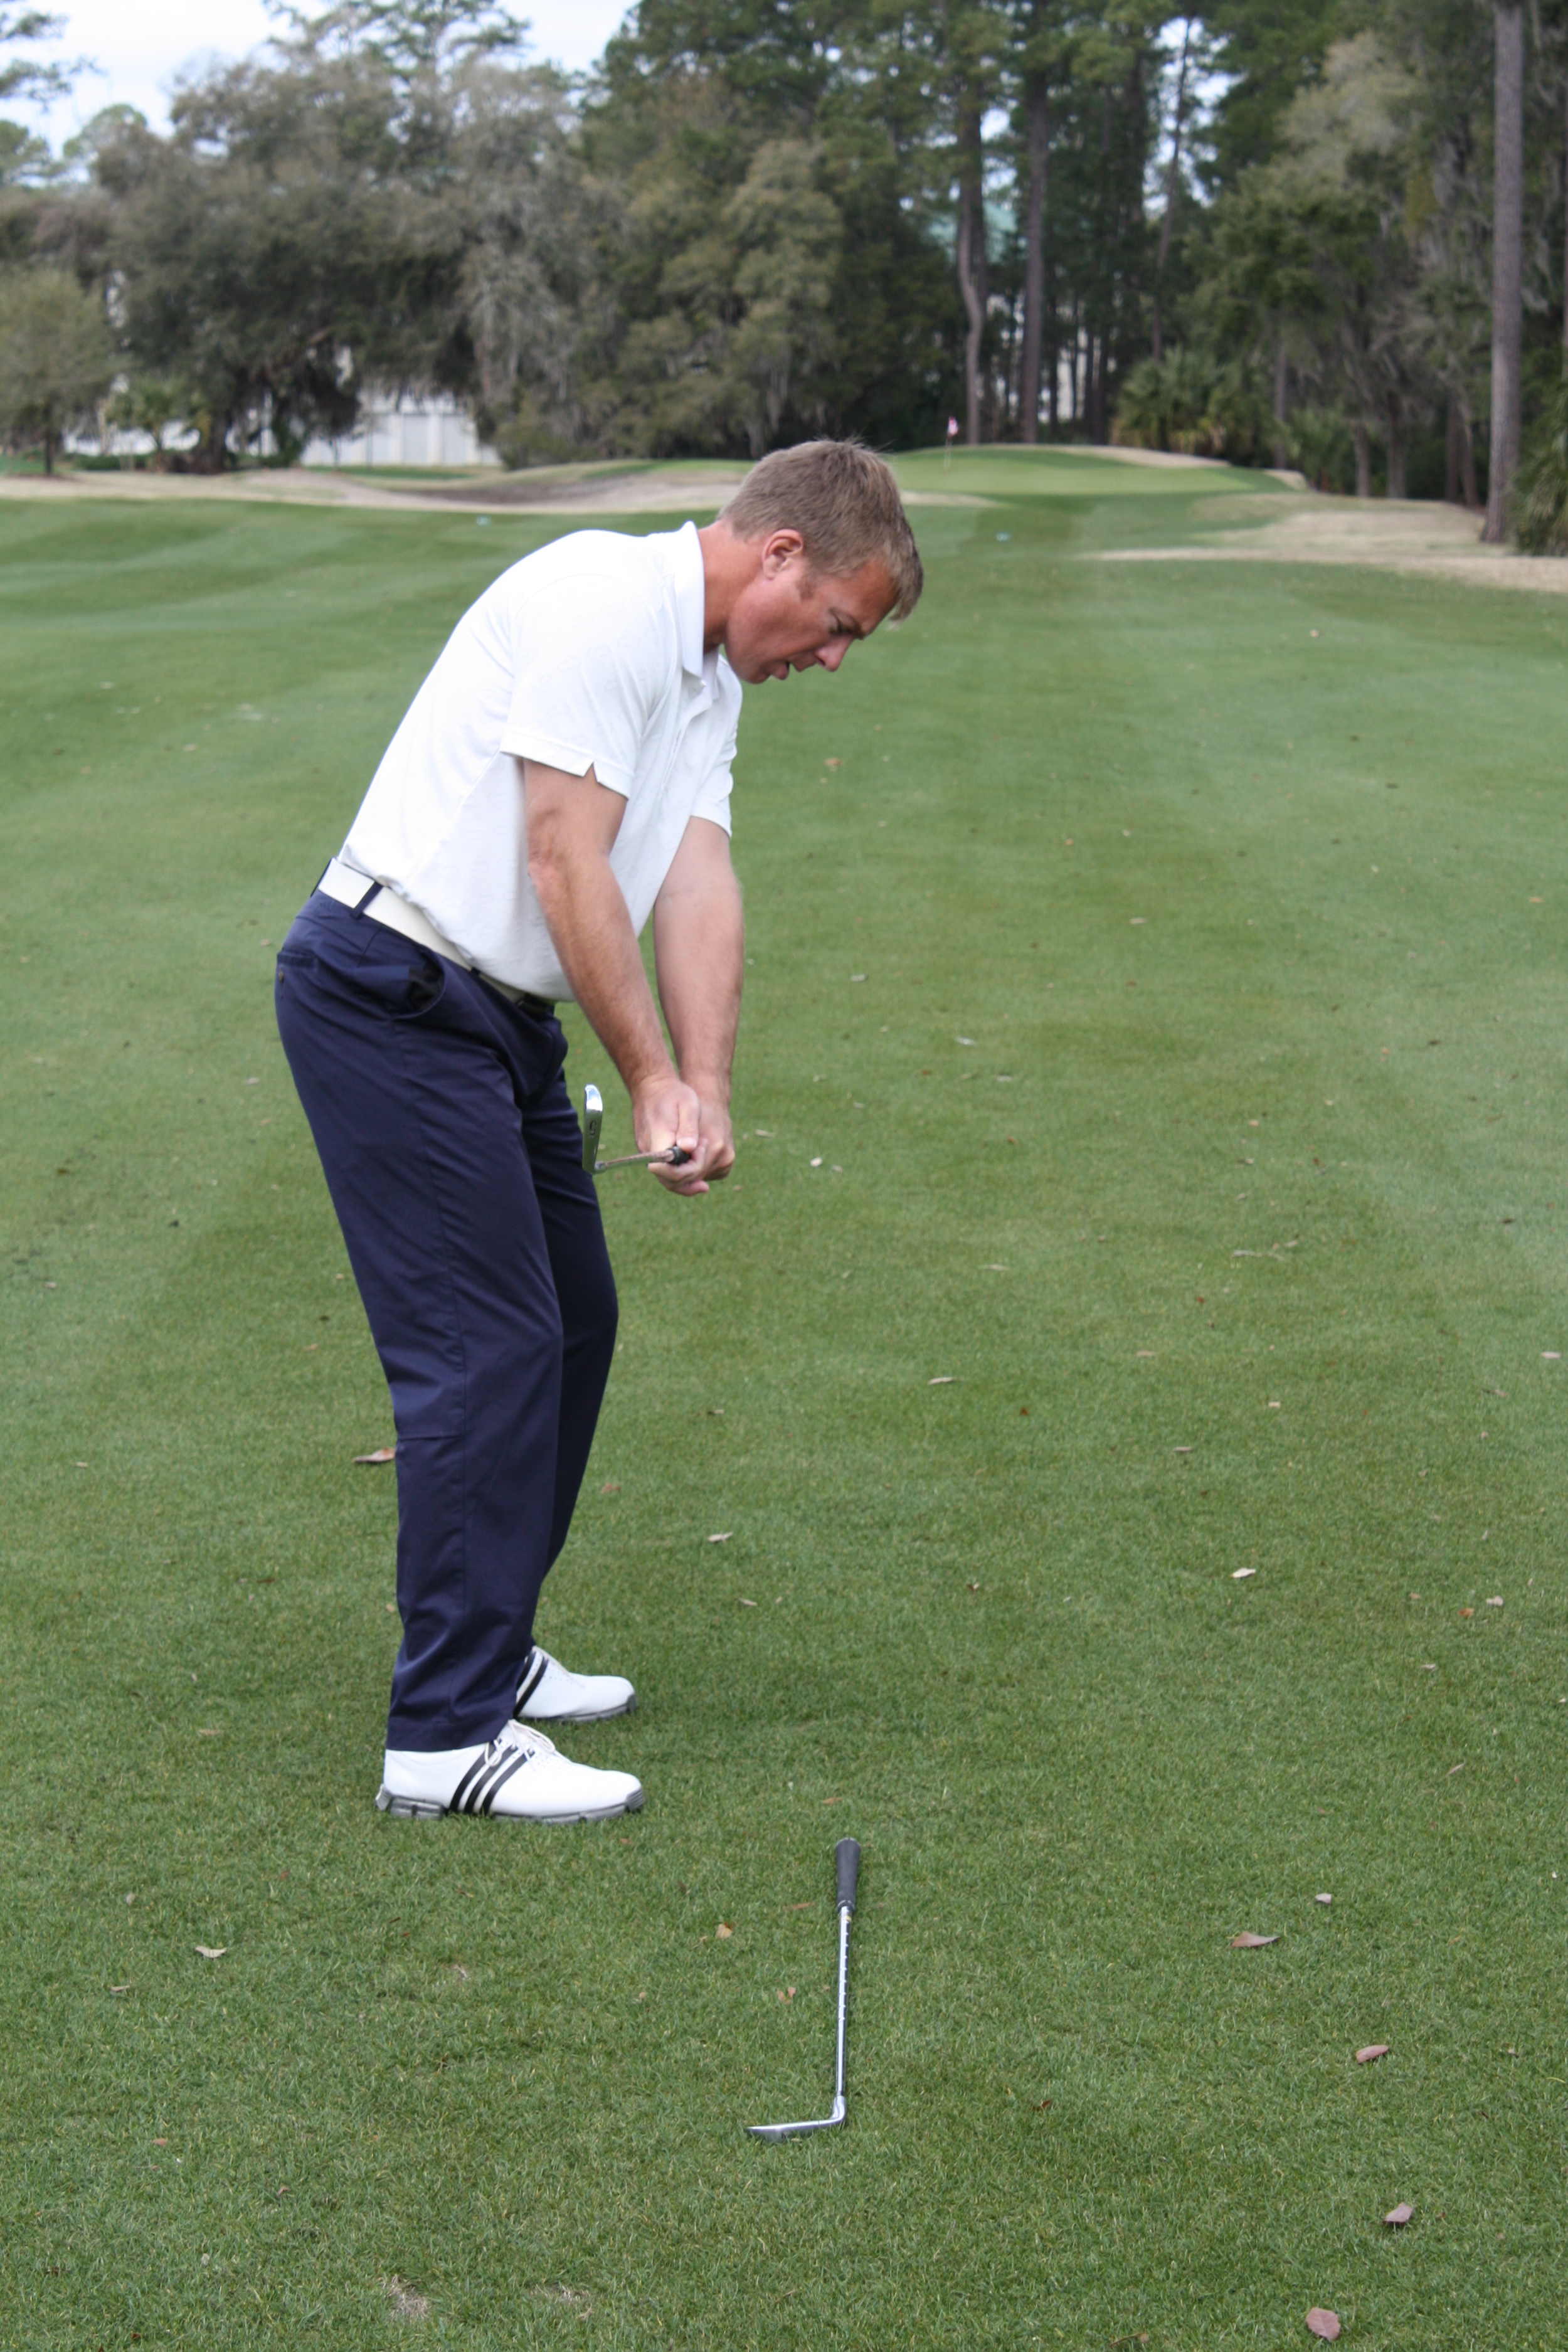
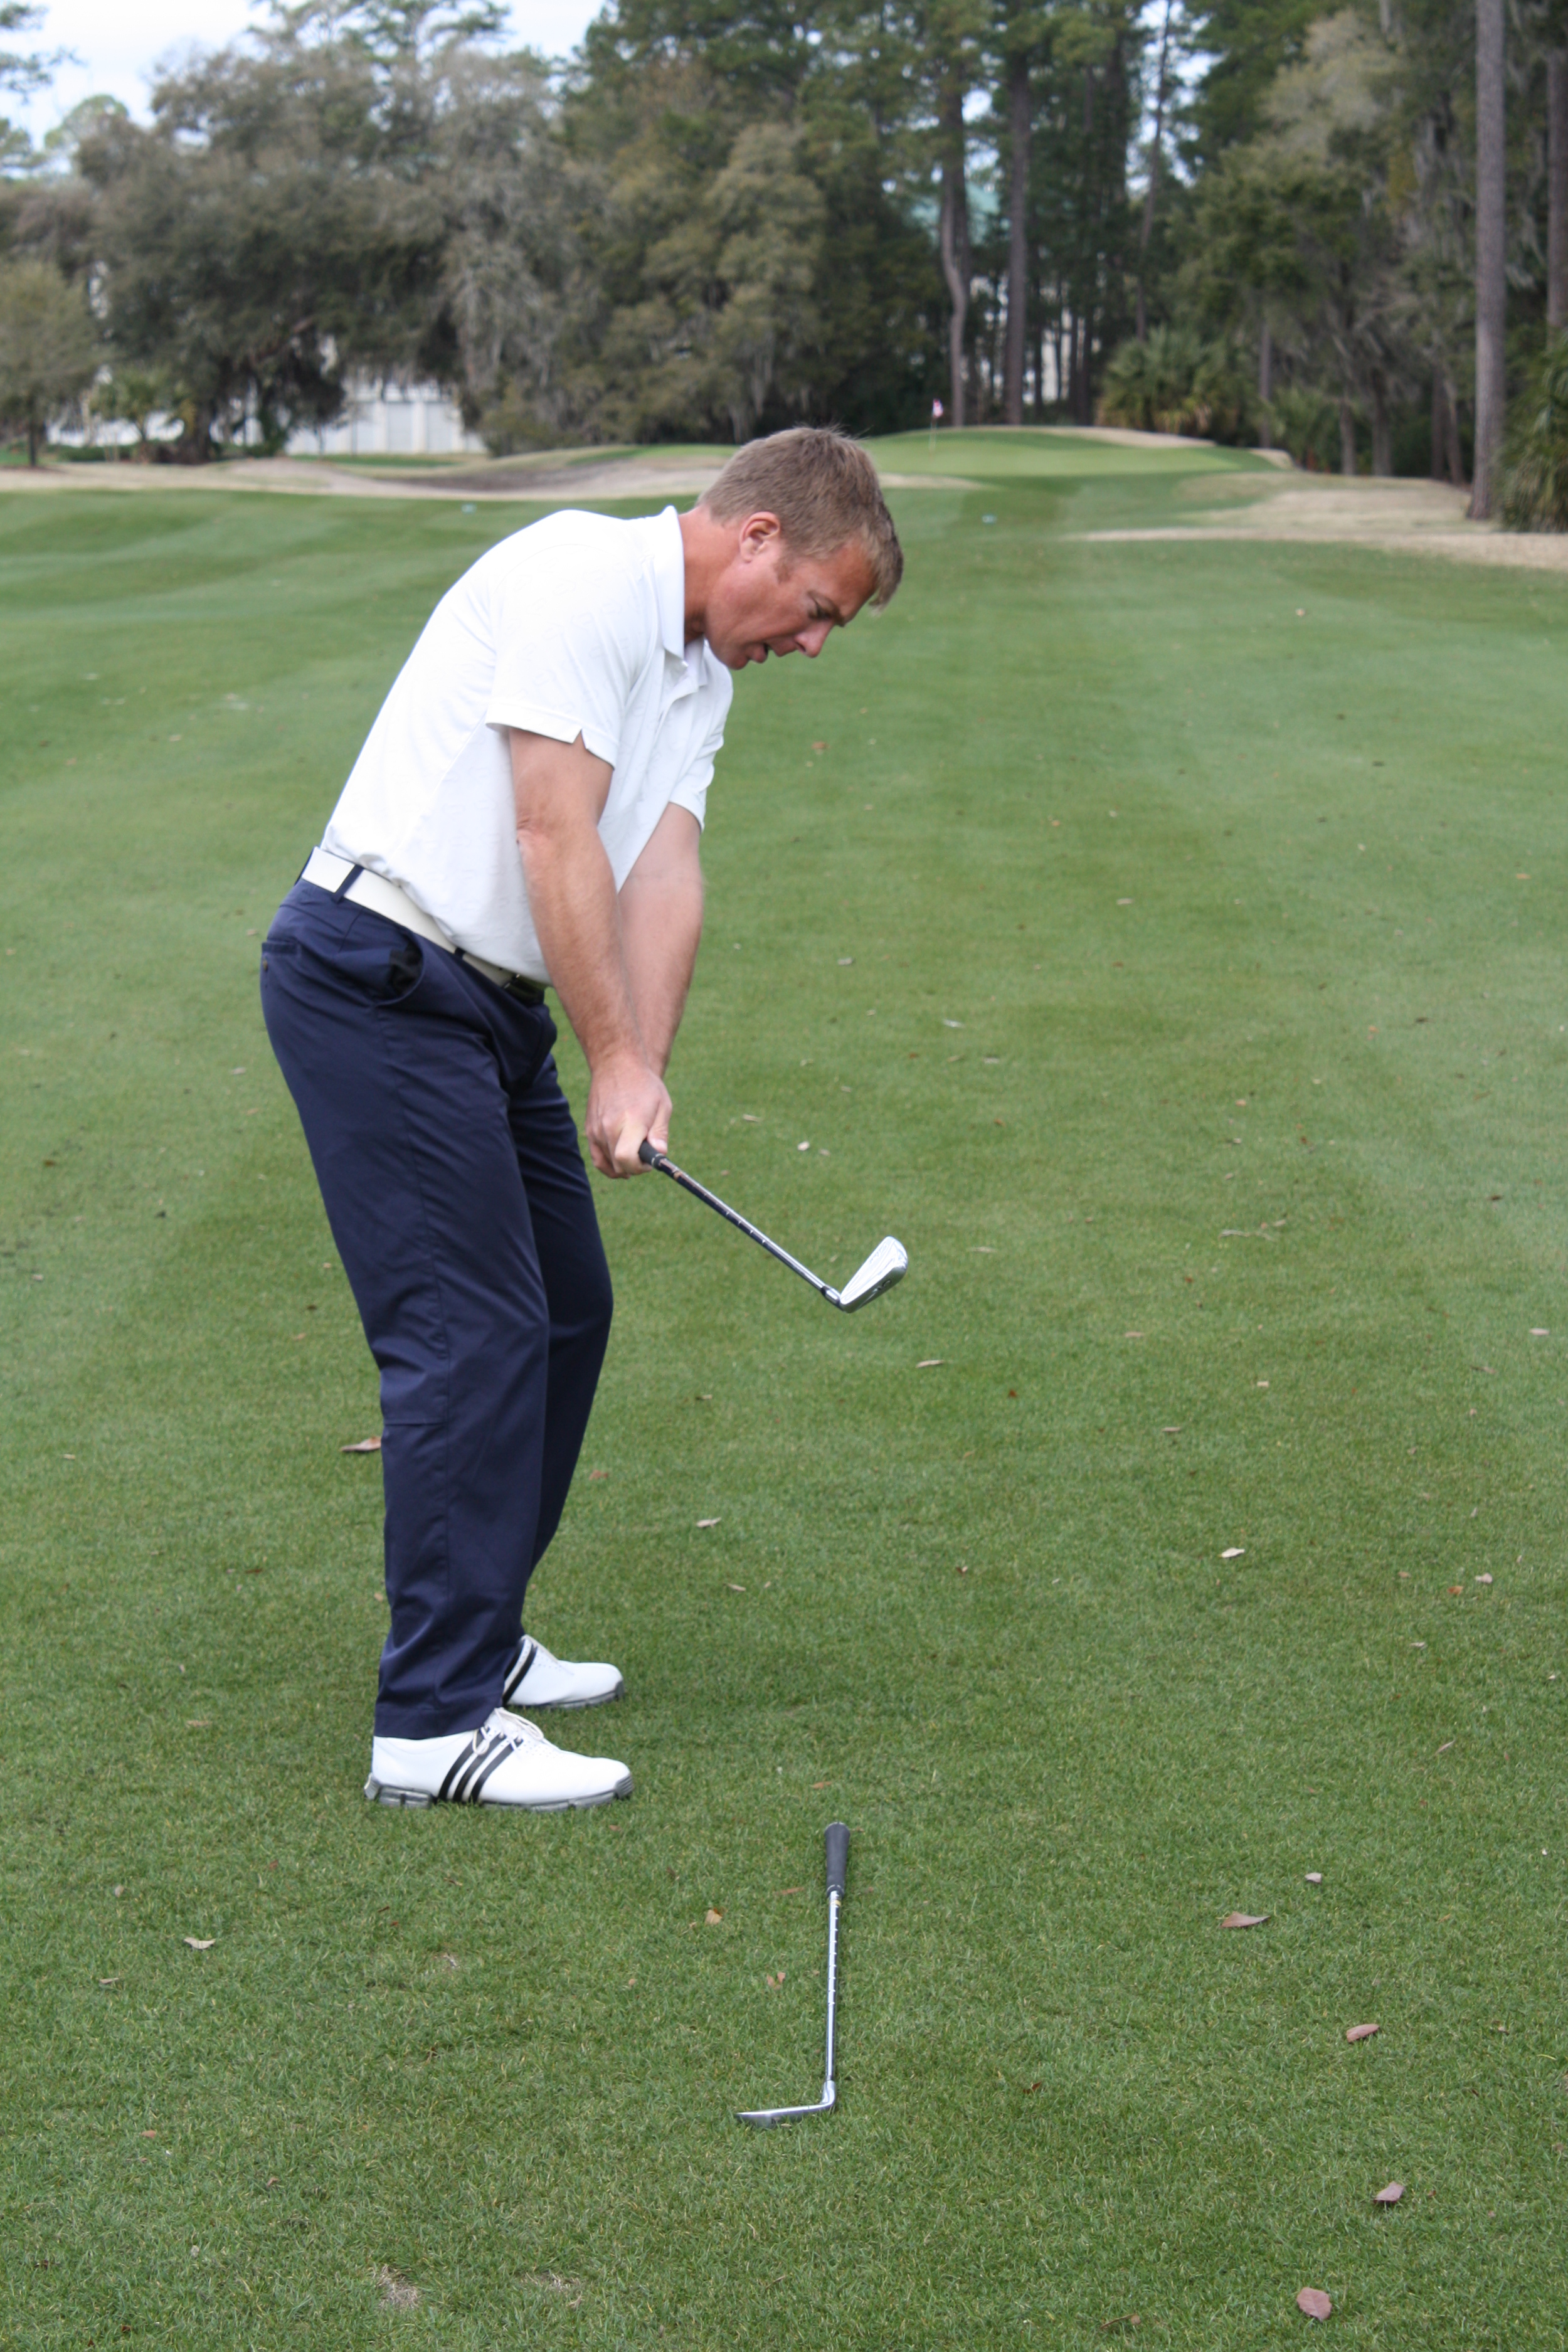
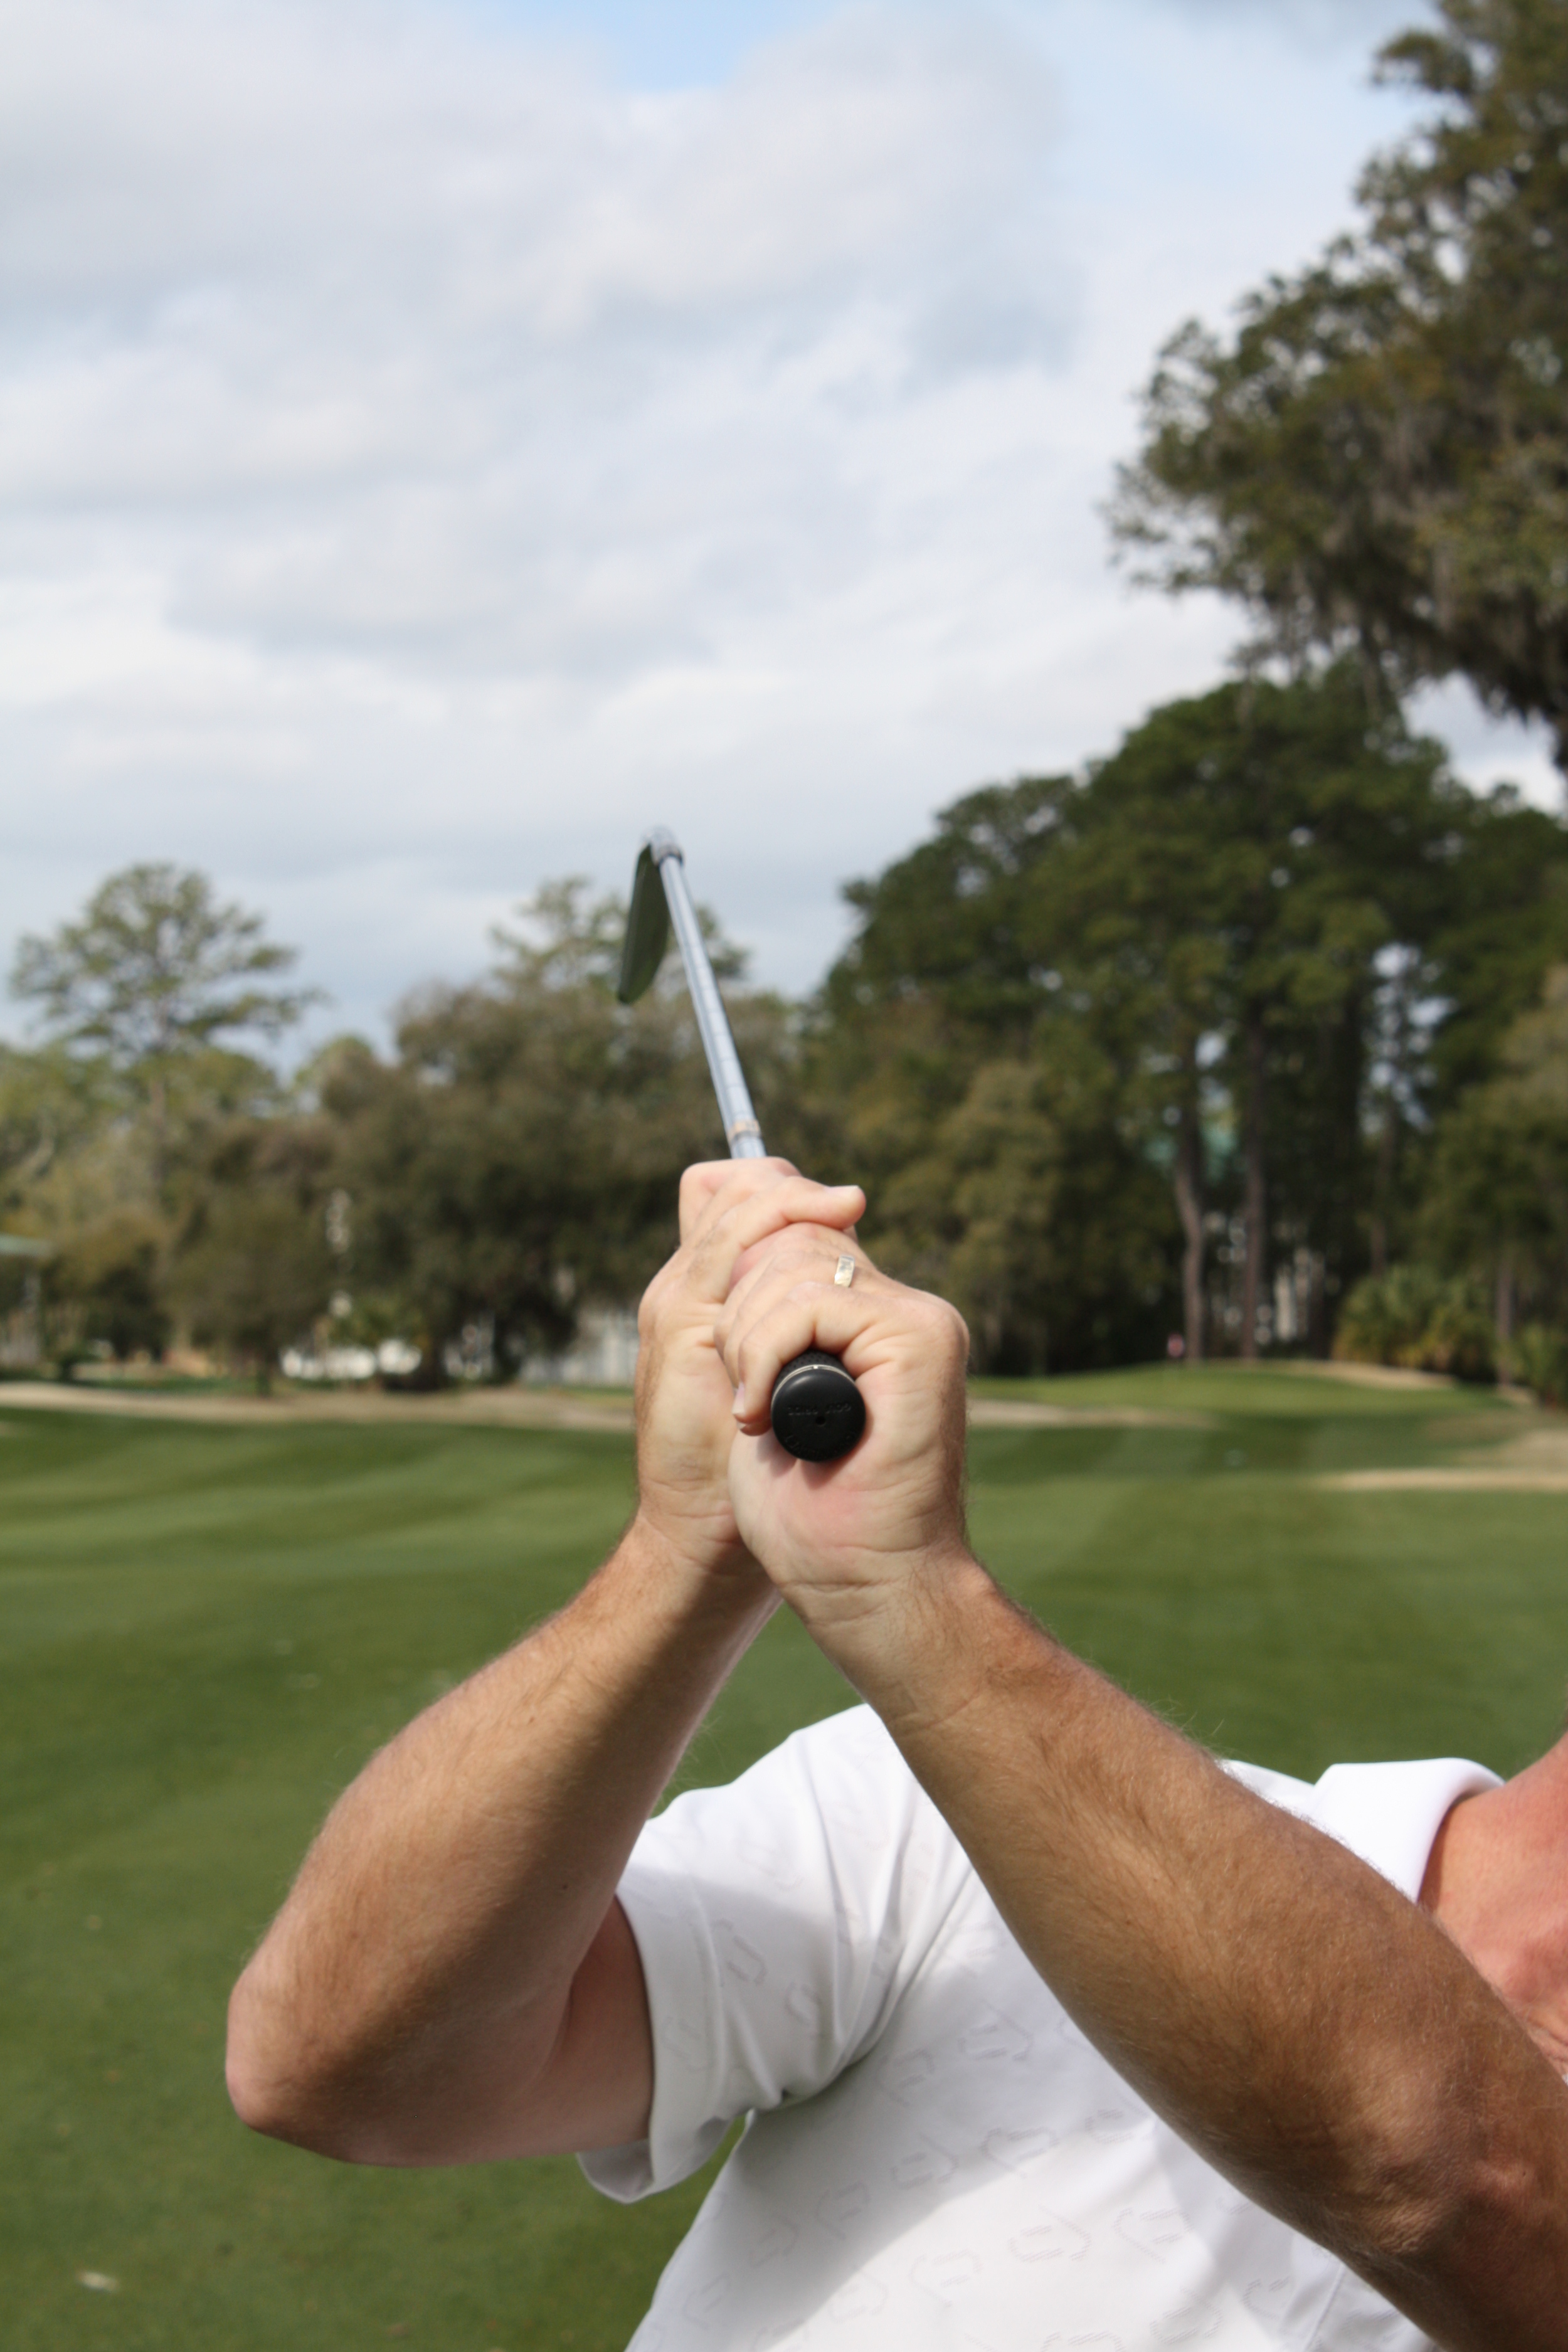
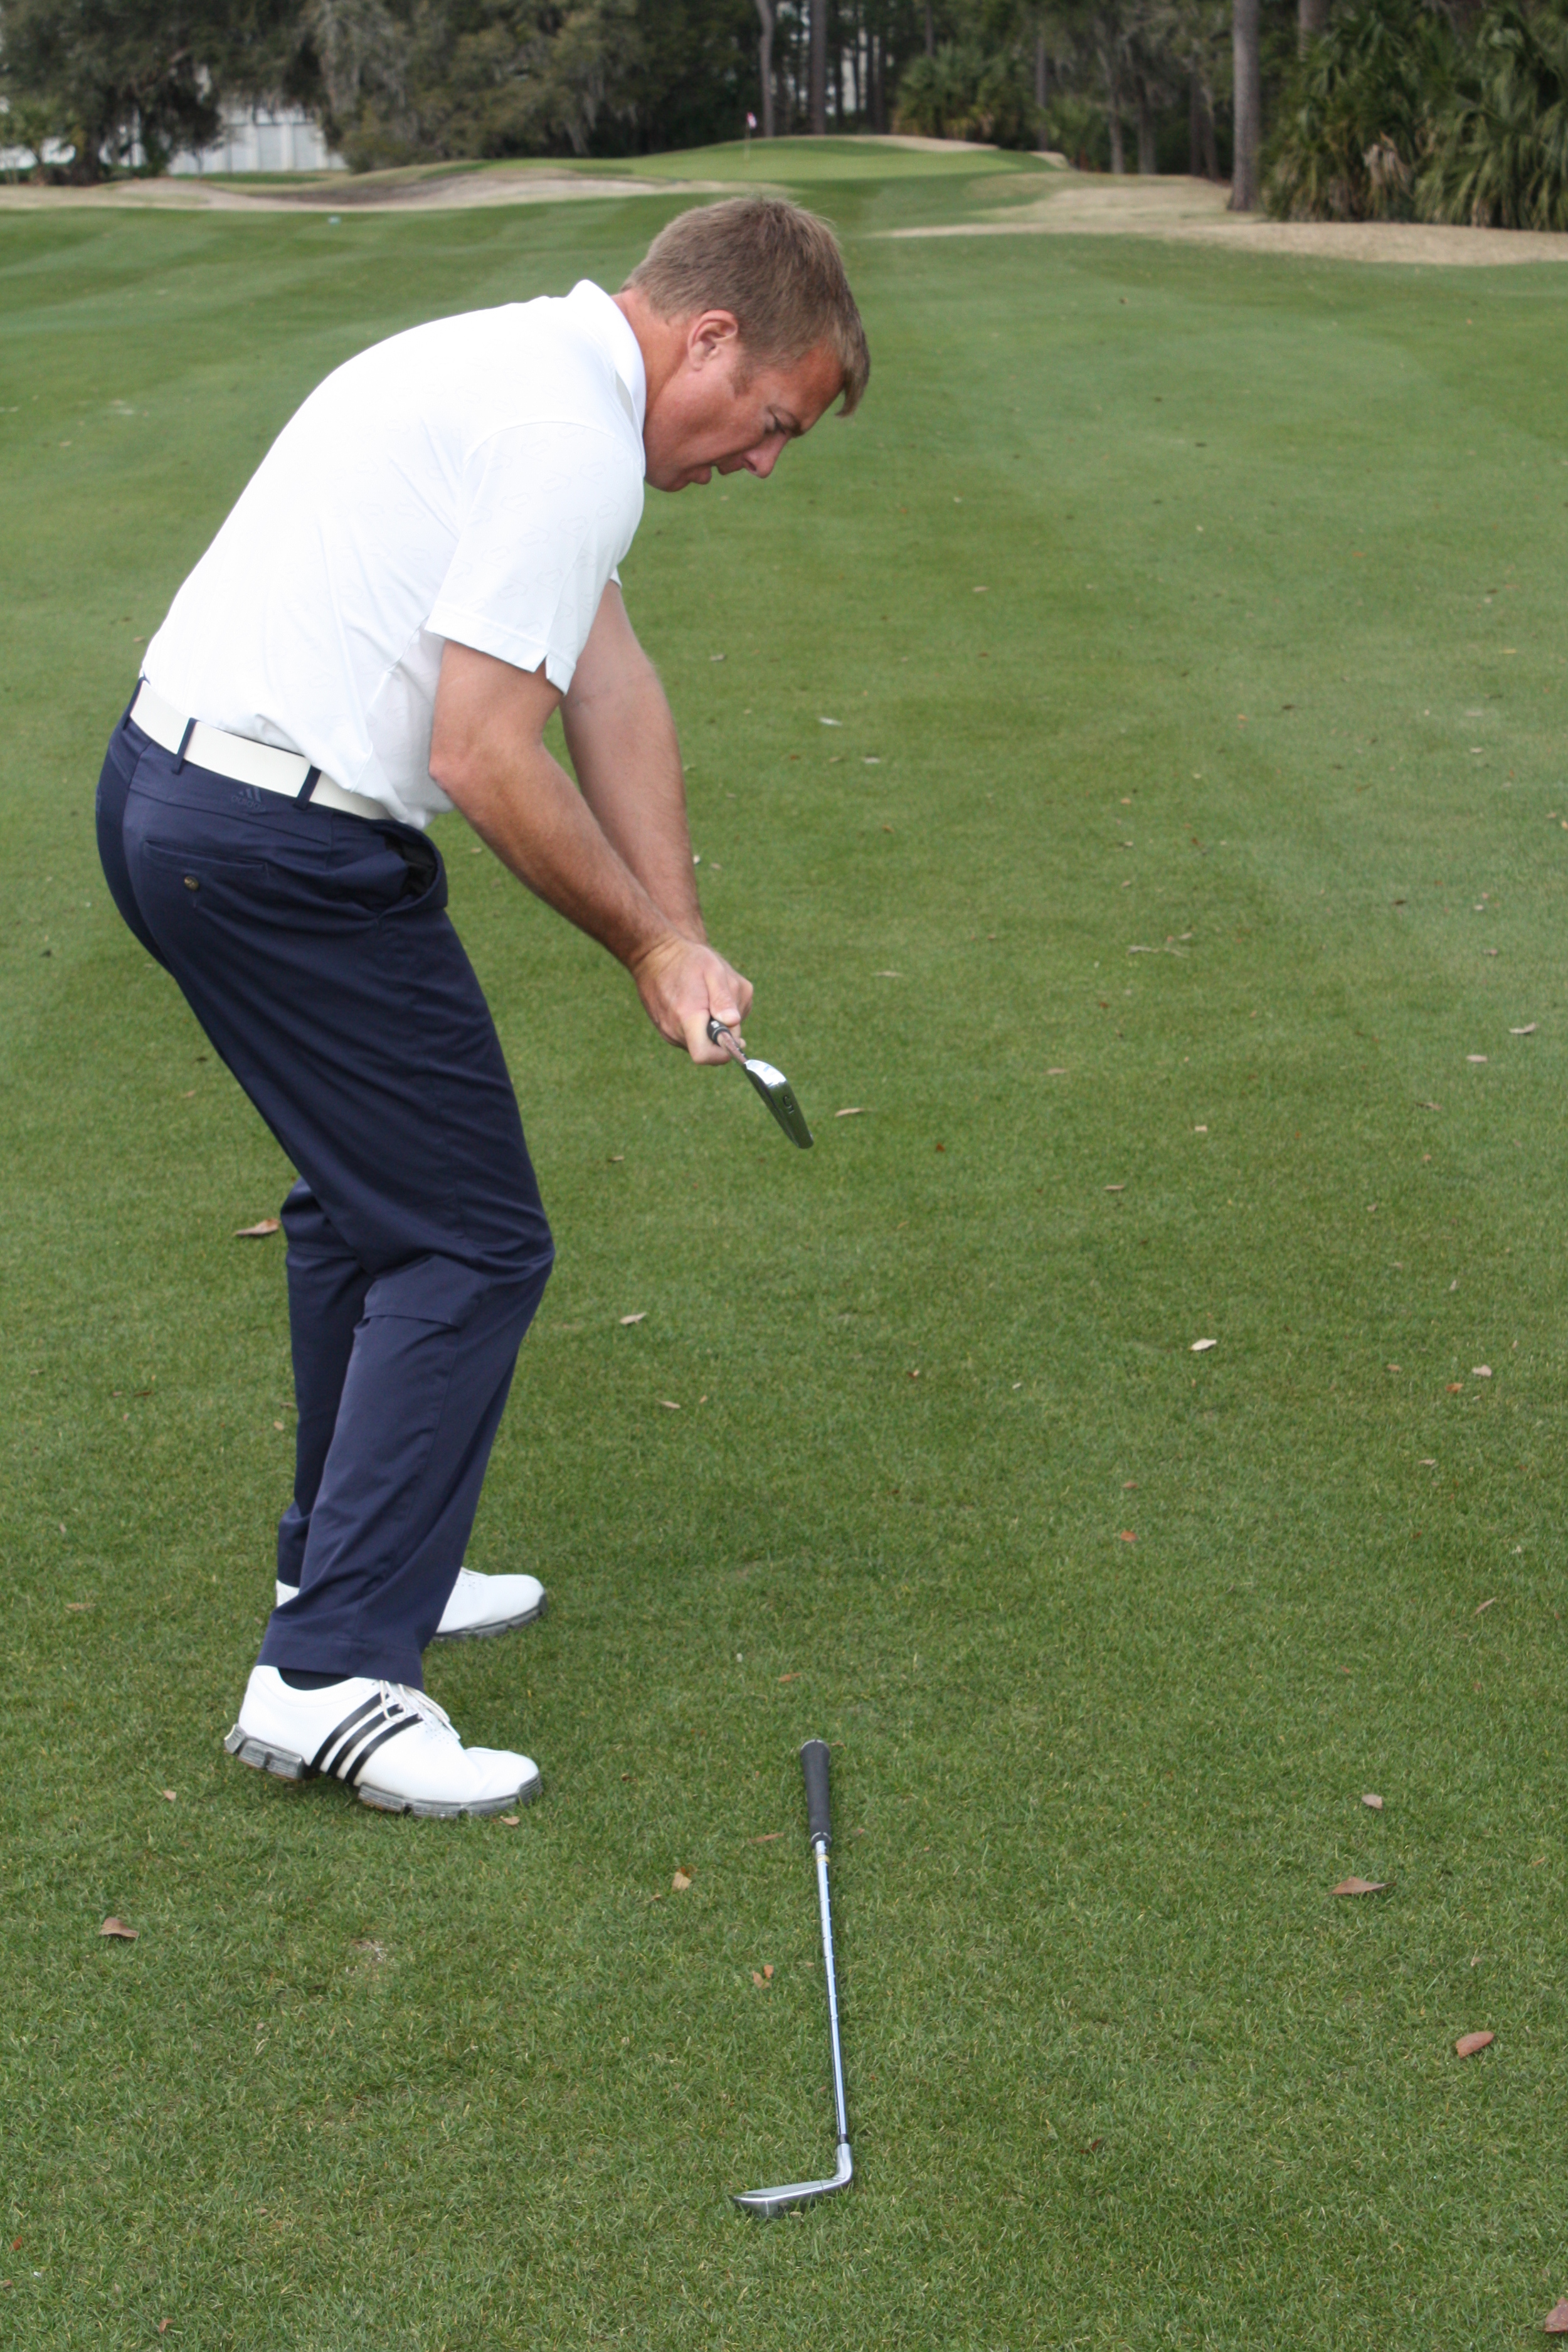
Hitting Draws

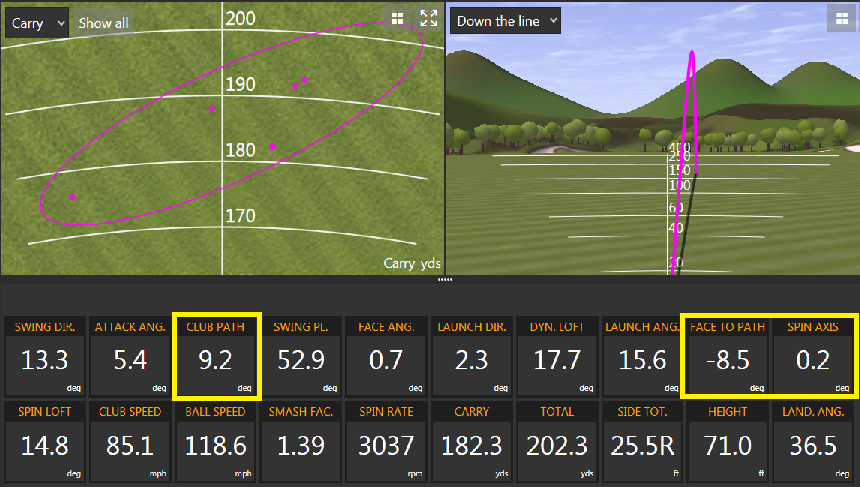
A functional draw is one that finishes at the target - something many of us strive for. In order to hit functional draws you need a clubpath that is traveling outward (in to out) and a clubface that is angled slightly closed relative to the clubpath, yet open to the target (assuming center contact). 

It is possible to hit both functional draws, ones that finish at the target, and bad draws, ones that move away from the target, with a clubface that is open, square and closed to the target at impact. You can even hit good and bad draws with the appropriate clubpath, but I believe an outward moving clubpath is integral to hitting functional draws. And here's why...

I am yet to teach a golfer who fades the ball that consistently swings from in to out!

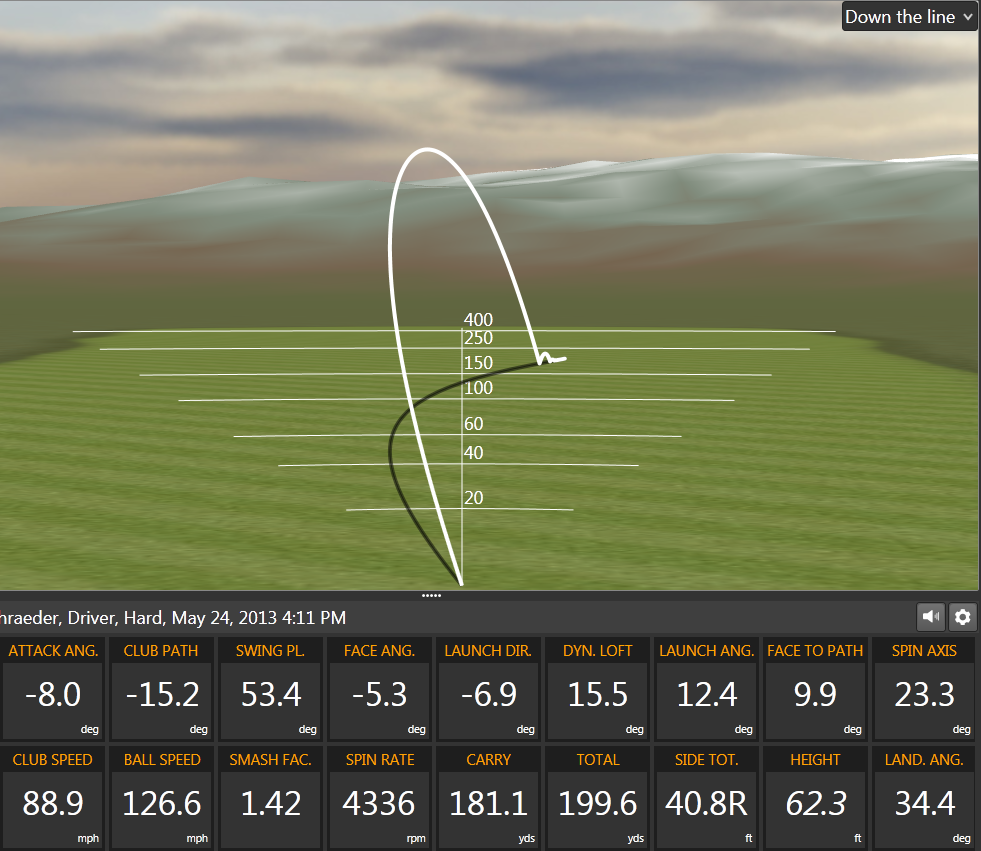
Clubpath is king and clubface is queen - I might get the desired shot shape with clubface, but I cannot get the desired result without clubpath. It is simply not possible to hit a functional draw with a clubpath that travels from out to in (assuming center contact). It is clearly not the only thing, but in my opinion it is the most important thing.

I am well aware there are many different ways to achieve this and whether as a coach or golfer you upgrade the clubface first or the clubpath first is entirely up to you. After all it's all about results no?
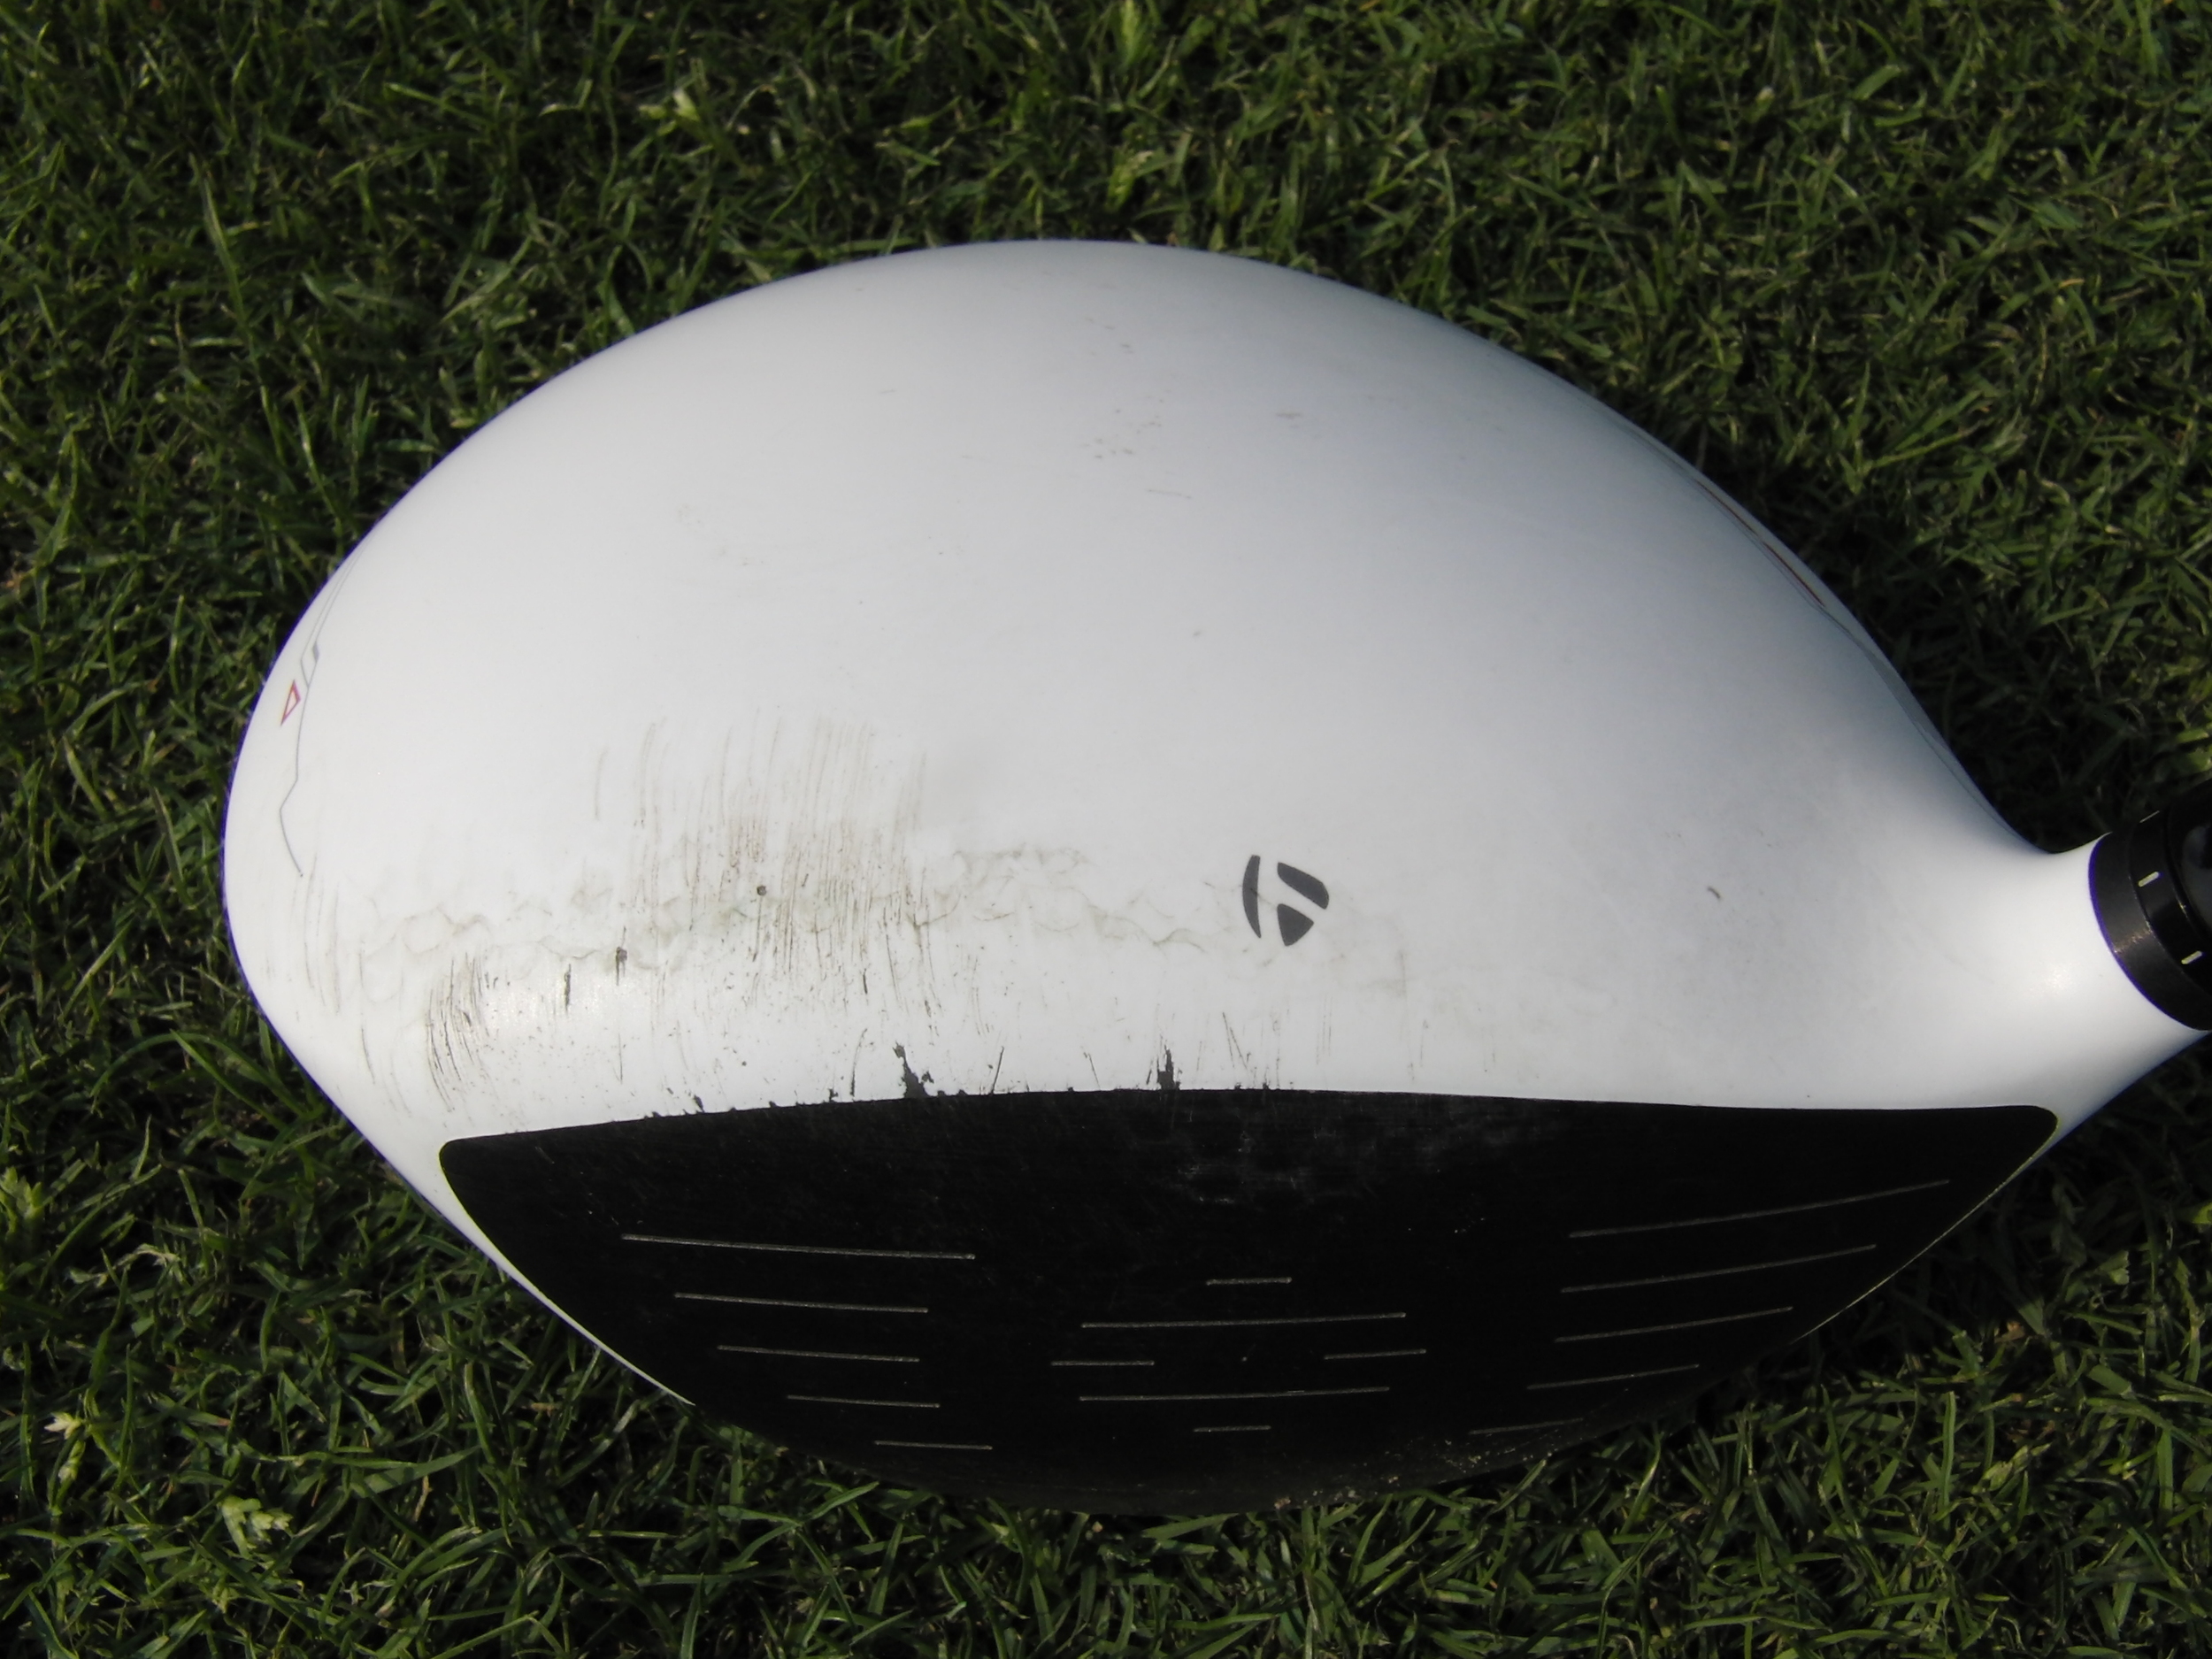
Smash Factor

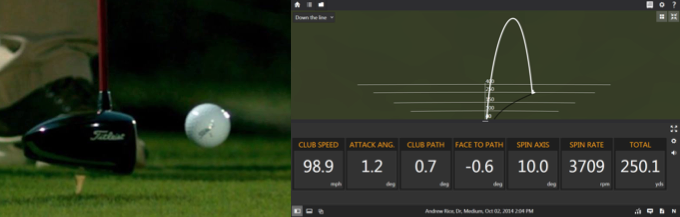
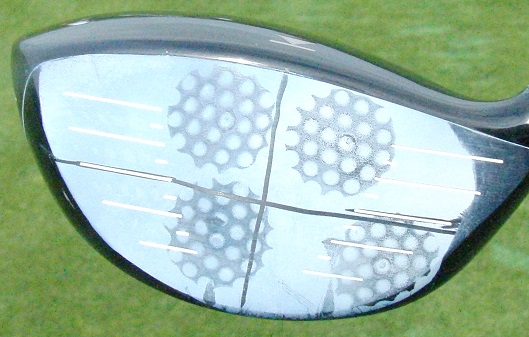
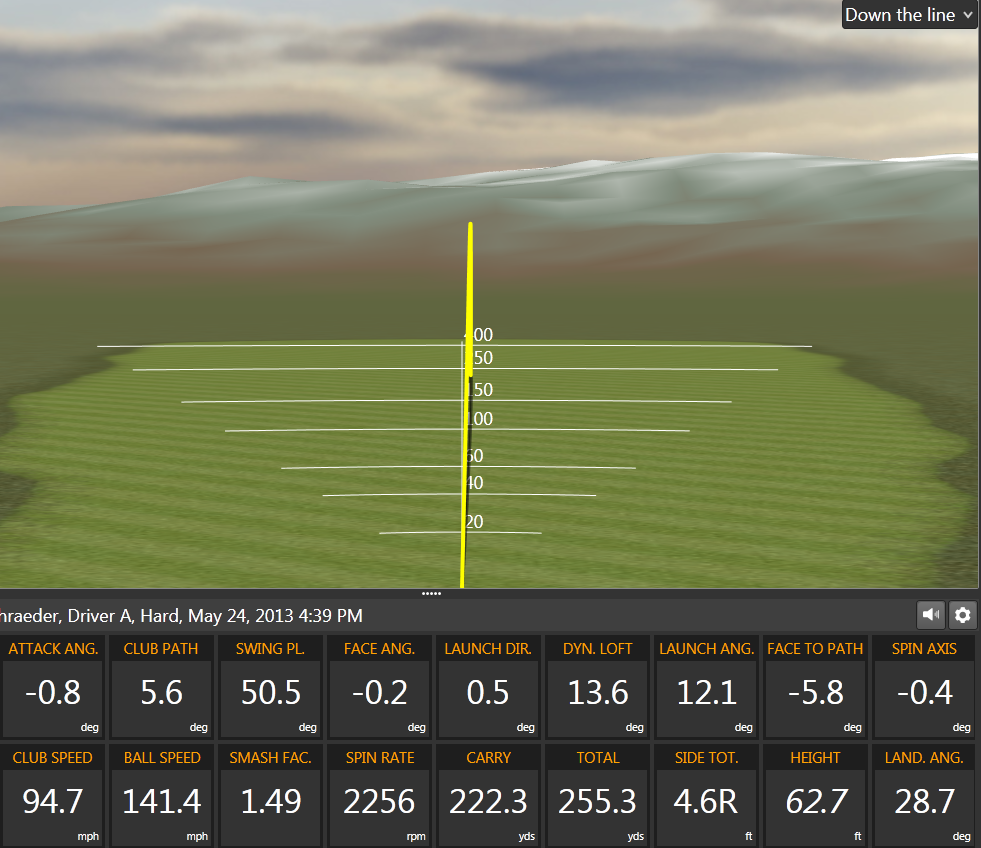
Many golfers and TrackMan users are under the impression that smash factor indicates how well a ball was hit, or how centered the strike was - this is not necessarily the case. A high smash factor purely indicates high ball speed relative to club speed. Here is the simplified formula:

Smash Factor (Simple)

It is quite possible to have  a smash factor with irons that is too high. Golfers who play from a closed face position and who tend to flight the ball low will often have a higher smash factor than golfers who flight the ball appropriately. This does not mean the low ball hitters are striking it better, it just means they are generating too much linear ball speed off of a particular club.

It is important for golfers to understand that ball type and condition, dynamic loft, clubhead mass, attack angle, CoR and of course quality of strike go into determining the smash factor for any given shot.

The objective with the driver should be 1.50 or higher, but with the shorter clubs a higher smash just might not necessarily better. Go for solid hits and ball flight over smash factor any day!

A Note to Golf Coaches: 

I have made more than my fair share of mistakes in life. From these mistakes I have learned and improved as a coach and a person. One of the many valuable lessons I have learned from making mistakes is to never deride, belittle or insult another golf coach. It does nothing to enhance your image or reputation and you will never look better while attempting to make someone else look worse. Be wise when addressing other coaches and the methods they employ - you'll be better off for it.

Get Faster Off the Tee

Here is an exercise to help you gain a few miles per hour of clubhead speed over time and allow you to pick up that much needed yardage off the tee. The objective is to slowly introduce your body to the increased speed, efficiency and agility necessary to generate additional clubhead speed.

Here is what is required:

  • It is important to get loose prior to starting your speed sets
  • Using your driver you want to hit two sets of five golf balls with a recovery period in between each set
  • There should be little concern for accuracy or even quality of shot - the sole objective is speed
  • The first shot in each set should be at your normal driver speed
  • Each shot builds on the speed of the previous shot
  • The final shot in each set should be the absolute fastest you can possibly swing

If you can do two speed sets as mapped out above 3 times a week for a month I would be surprised if you had not gained 4 mph of clubhead speed when making a normal feeling golf swing. That's enough for 10 more yards off every tee box!

Additional resources for more distance off the tee:

Getting More Out of Your Driver | Andrew Rice Golf

Hitting Up or Down? Here's How to Set Up | Andrew Rice Golf

Hit Up On the Driver: Here's a Great Drill - YouTube

A Clubface Primer

A Square Face at the Top

It is important to understand that the angle of the clubface will influence a golfers' ability to get into a proper impact position. Athletic instinct will always compensate in order to position the face squarely (or as squarely as possible!) at contact. Thus, a square clubface will allow any golfer to naturally more repeatable impact position.

There are three good check points that occur prior to impact to observe the position of the clubface. As these check points get closer to impact they tend to have a greater effect, not only on the impact position, but also the outcome of the shot. Here they are:

Going up:

An Open Face
An Open Face

- Invariably if the clubface fans open early in the swing the clubhead will assume a position inside the hands at this point.

- Here the face is looking more towards the sky than is optimal

- Also notice how there is more daylight between my left hand and right thigh than the picture below

A Square Face
A Square Face

Ideally the clubface should be vertical to slightly tilted down here with the clubhead covering the hands.

A Closed Face
A Closed Face

- In this situation the clubhead has lagged a little behind the hands and arms with a slight draggy start to the swing

-The arms are moving in and close to the body as the handle stays inside the clubhead

- The clubface is looking at the ground too much here

At the top of the backswing:

An Open Face at the Top

- Notice how the clubface hangs down vertically (almost perpendicular to the ground) and is visible under the shaft

- Also notice the cupping in the back of the left wrist

- This position requires active hands through impact and will generally lead to an over the top approach into the ball

A Square Face at the Top

Ideally here the clubface should parallel the shaft and the angle of the left arm.

Here you can see the clubface angled up toward the sky (almost parallel to the ground) and it is clearly visible above the shaft

- The left wrist position is quite flat and may even become bowed

- This face position will often cause a golfer to get under plane coming into the hit and force the body to raise up through the hit in an attempt to hold the face square

Coming down:

Open Face Approaching Impact

- This position invariably causes a wiping motion across the ball through impact

- The weight will invariably stay back as the golfer tries to position the body to aid in squaring the face

- Shots struck from this open faced position will be weak and generally not have any "sting" on them

Ideally here the clubface should be in a position where it is perpendicular to the ground.

Closed Face Approaching Impact

- This clubface position will lead to a raising of the hands through impact

-There must be a loss of body angles through the hit in an attempt to deter the face from flipping closed

-Practice hitting high, cut up 8-iron shots that travel 50 yards to overcome this fault

Additional articles regarding the clubface:

What is a Square Clubface? by Dave Wesley

Secret to Squaring Your Clubface by Kelvin Miyahira

Keep a Square Clubface by Karen Palacios-Jansen

See open, closed, and square club faces by Ty Daniels

From Slicer to Bomber

An Average Slicer Tee Ball The above TrackMan screenshot indicates a very typical pattern for the slicer - an overly inward club path (-15.2 degrees out to in) along with a clubface angle that is open/right of where the clubhead is travelling (9.9 degrees). This package results in shots that invariably launch left and curve aggressively right, often shaping across the target line. The end result is a far from optimal tee shot coupled with a healthy fear of any shot that leaks too far into right field!

The video below demonstrates what I did with the "owner" of the slice illustrated above. I have had tremendous success with this technique - primarily, I believe, because it taps into a golfer's instinct that screams - in order for my ball to not leak right I must swing as much to the left as possible. Essentially the drill gives the golfer a reason, something they've never had, to swing to the right. Take a look....


  • Tilt the face down 30 degrees (1 hour)
  • Take normal grip
  • Adjust shoulders and arms to square the face at address
  • Swing out to right field

After working on this drill for a while the golfer started to get comfortable and gain a measure of confidence that the ball actually would work back to the left.  This is what happened...

From Slicer to Bomber...

As you can tell from the above numbers the golfer has hit this shot more 55 yards longer. Part of that (15 yards) is due to an increase in speed, but as you can see - this player is now swinging from in to out, is hitting far less down on the ball, has substantially less spin and were it not for a slight heel side strike this would have been even longer.

These screenshots were taken during the course of a standard one hour lesson. They indicate an average shot from the player before the change and after. The golfer hit shots that were worse and better than both examples shown. Unfortunately an increase of 55 yards is not normal, but every little bit helps...!

Shot Shaping 101

There are many, many different ways to control the shape of a golf shot, yet none quite as reliable as the method I have outlined below.

This formula works off the fact that most golfers spend hours trying to make their golf swing as consistent as possible.  If you spend all that time 'grooving' your swing why, when you need to shape a shot, do you employ a totally different golf swing from the one you worked so hard on?

Do you remember your mother saying, "Two wrongs don't make a right!" ?

Well, for shot shaping, three rights make a left! And three lefts make a right. Keep in mind that whether you are a lefty or righty the formula works the same.  Here's the explanation:

To curve the ball to the right

  1. Aim your body and club face to the left; the direction you would like the ball to start.
  2. Move the ball position to the left in your stance. (As you view the ball)
  3. Rotate both hands to your left on the grip of the club. This should be done in a subtle fashion.

Once you are set and ready to fire;  make the same swing that you are accustomed to making and the ball should launch in the intended direction and curve to the right.

To curve the ball to the left

  1. Aim your body and the club face to the right of your target.
  2. Shift the ball to the right in your stance
  3. Rotate both hands slightly to the right on the grip.

With a little practice you will start to get a sense for how much the ball position or grip needs to be altered in order to produce the desired result.

Regardless of whether you are a Tour golfer or a beginner,  shot shaping is a necessary component to controlling your golf ball.  If it's simply a hook to find your way back into play or a soft little cut 6-iron into that front right pin position shot shaping is something you need in your 'bag'.

If you have any thoughts or ideas on shaping the ball please feel free to let me know or post them here.

Foot Action in the Swing

Correct foot action throughout the golf swing is indicative of a body that is working well. A body that works well will create the opportune space necessary for the arms and the club to get into the slot - the delivery point where the club has virtually no choice but to do the right thing through impact.

Read More

How to Stop Flipping - Guaranteed!

Ben Hogan once said that he despised any ball flight that curved from right to left (a draw!). Having been a chronic hooker of the ball in the early part of his career he knew what it was like to lose shots to the left. It wasn't until he found a way to overcome the dreaded flip through impact that the legend that is now Ben Hogan was created.

If you too struggle with untimely hooks and occasional blocks, you fully comprehend what Mr. Hogan had to overcome. Flippers have to rely on timing to make their shots go straight - the timing of the hand action through impact determines the outcome of each shot. And when impact between ball and face lasts for approximately 1/2000 of a second it's not that easy to be consistent - especially under pressure! The better you play, the greater your anxiety level, the less you control the timing of the flip - not a good recipe for low scores when it counts.

Having studied the swings of Hogan and Snead I found that when viewed from down the line it appears that the clubhead and ball seem to disperse aggressively post-impact. The clubhead moves quickly back inside the target line, while the ball launches straight. It almost appears as if they are trying to hit slices, yet the ball flight is very straight.

Watch the following video to get a sense of what to feel while doing the Anti-Flip Drill:

To practice the drill you will need the following:

  • Two alignment rods - one on the ground just outside the ball and another in the ground just inside the target line and 18-24 inches forward of the ball. Be sure that the one in the ground is leaning away from you (towards the target).
  • A 7 iron with the ball teed up so you can make sure it is in the same location relative to the rod in the ground each time.
  • Start small and slow, making sure you swing inside the rod with the clubhead and keep the face square to open thus launching the ball to the right of the rod.
  • Patience! Give it a few goes and you'll start to get the feel. Feel the clubhead and ball dispersing - one goes left and the other goes right. Remember that you have not been doing this "naturally" and that's why it feels so strange and "incorrect".

Here is the drill demonstrated in slow motion:


The Golf Swing and Time

A common complaint I hear from golfers is that their swings are too fast or aggressive.  They just have a sense that they are quick either in the transition or the downswing. Rhythm and pace are very important elements in the golf swing. When a golfer feels quick the first thing they do is try to 'slow down'...and in an attempt to get some rhythm in the swing they often go overboard and end up slowing everything down a little too much. This can lead to an overly slow start to the swing, which in turn leads to a rapid change in pace during the transition and on into impact.  It is this drastic change in speed that conveys the sense of quickness and aggression in the swing.

The PGATour average time for the backswing is right around 0.75 seconds, with an additional 0.25 seconds for the downswing. Notice that ideally there should be something close to a 3:1 ratio of backswing time vs. downswing time. That means that on average a Tour golfer will strike the ball in about a second from when the swing starts.  Ernie Els, one of the smoothest swings out there, takes just over a second to strike the ball while Nick Price, who has one of the faster swings, takes  around 0.8 seconds.  Far too many of golfers I teach take well over a second to complete just the backswing.  In watching Els or even Price, most golfers believe they swing a whole lot faster than either of those two top players - that is not the case.

Each of the above golfers are able to maintain a good rhythm in their swing because they maintain something close to a 3:1 ratio in their swings.  When a backswing takes over a second to complete the golfer is now faced with a 4:1 or even 5:1 ratio which feels way out of rhythm.

Here are a few pointers when trying to get better rhythm and pace back into your swing:

  • Don't try to speed up your backswing up too quickly - take one pill a day and not the whole bottle...
  • The body should not feel hurried; the wrists and arms will create much of the necessary increase in speed.
  • Try a few shots with the clubhead starting 2-3 feet ahead of the ball and then flow into the backswing in one motion. This gives the club a moving start and gradually increases the pace.
  • Remember that rhythm does not have to be slow...
  • Stay patient and gradually build up to it; try to build the speed in your downswing from the transition.

There are not many ways to track your timing ratio, but SwingCatalyst software does it for you.

Another factor to consider is that the less time your swing takes the less opportunity you have to get your body out of position. This is a very important factor and cannot be overlooked - keep the motion concise and it is more likely to be consistent. Give it a try....